Showing posts with label sewing. Show all posts

Tuesday, October 22, 2013

Embroidery Stitch Library + A Giveaway (CLOSED)


The Embroidery Stitch Library is up and running! If you haven't already, go take a look and let me know what you think. The library will be updated frequently with not only embroidery stitches, but patterns and projects as well (so you can have some inspiration for practicing your stitches!).


Each stitch has a step by step photo tutorial, with written instructions (in English). I have tried to make the photographs easy enough to follow that you can learn a stitch from start to finish without really needing to read the whole post.


Projects in the library link back to recommended stitches, if there is a stitch you don't know you will be able to click back and learn the stitch while you make a fun new project. There are even tutorials on creating your own patterns to embroider!


To celebrate the stitch library going live, I am hosting a giveaway of embroidery goodies! The giveaway is open worldwide and the winner will be announced Nov 5th. To enter, use the rafflecopter widget below - allow time to load.

a Rafflecopter giveaway

Giveaway prizes include:

Gingher embroidery scissors
Embroidery hoop
pack of embroidery needles
package of sewing themed iron on embroidery patterns
assorted DMC embroidery flosses
1 yard of cotton muslin fabric for practicing your stitches
Misc. crafty odds and ends from my stash


Monday, June 4, 2012

Book Review: Sewing Made Simple


Hey Everybody! I have a ton of sewing projects lined up over the course of the next few months, so I decided to get a book review up for those of you that might not yet be well versed at sewing! Sewing Made Simple icon is a great sewing primer by Tessa Evelegh, and is published by one of my favorite independent publishers, Chronicle Books icon. I would highly recommend it not only for sewing newbies, but seasoned vets, as it is full of great tips, and has about 20 projects that utilize and build upon the skills shown including clothing and home decor projects.


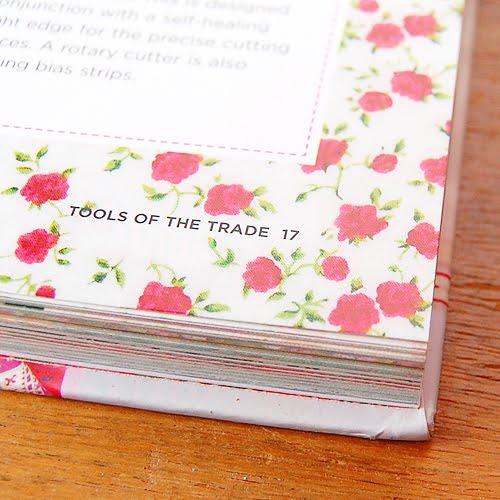
From a purely aesthetic standpoint, it is a beautiful book, with great photography and the kinds of special details I come to expect from pretty much all Chronicle Books. No white borders here, your pages are trimmed with lovely fabric prints in colors and patterns that will inspire you to pick up the book and start sewing as soon as you lay eyes on it. There are also tons of full color photos, as well as some cute, hand drawn diagrams.

There are some really great sections on sewing machine anatomy and tips on buying a sewing machine (which I actually found incredibly helpful as I inherited my current machine from my mom when she bought her new one, but I have been thinking about the possible upgrade to a machine that does more stitches and fancy-pants work like one touch buttonholes and the like). It definitely helps you to get a starting place for what you may need or want in the wide world of sewing machines! If machines aren't your thing, there are also lots of tips and techniques on hand sewing (including "must know stitches" complete with diagrams!).


The total sewing novice will appreciate all of the labeled and numbered photographs the book provides you with on different types of threads, needles, scissors, buttons, etc. Heck, those who have been sewing for years may have their eyes opened to something you just never used before because you didn't really know a good application for it!


My favorite part of the book is that every section has helpful little tip "bubbles" that give you a tip or trick on how to make a technique easier. If you used to steer clear of zippers, or pin tucks, it might have a tip that makes them your new favorite thing (I know I'm excited to try out pin tucks on lots of new projects!).

My one and only gripe for the entire book is that some of the patterns in the back need to be taken to a copy store and blown up to a usable size. I love instant gratification, so to have to go someplace to get my patterns blown up before I can use them is a little irksome. Other than that I think this is the perfect book for anyone that sews or wants to learn!


Chronicle Books provided me with a copy of this book for review. All statements and opinions above are my own.

Friday, December 23, 2011

Vintage Embroidery Patterns


Get out your hoops and floss, it's embroidery time! I found this great flickr group with thousands of vintage embroidery patterns (through Pinterest, of course). I just had to share with you all! If you are seasoned at embroidery these would make tons of great last minute gifts for the Holidays: on hand towels, tea towels, wall hangings, pillows, apron embellishments, etc.

There are a bunch that would be great for beginners too! Maybe over the holiday weekend you can teach yourself a stitch or two and whip up some goodies as well. Here is a great resource for teaching yourself some stitches to get started.


I am also starting some embroidery tutorials if the site above isn't informative enough for you. I will try to remember to come back to this post and link them all so they are easy to find.


Backstitch
French Knot
Satin Stitch
Couching


I hope everyone has a great weekend and gets to enjoy some time with friends, family and crafts!


Wednesday, December 14, 2011

Scrappliques!


Here is another easy scrap project: appliques. These can be permanently fixed onto anything you like, or you can turn them into pins, brooches, etc. and put them on something temporarily, you can even stuff them to make a more 3-d pin! They can also be made in any shape you have scraps big enough for: I chose a mustache because I had the pattern handy from my Portlandia Potholders.


To begin, select the scrap fabric you will be using. Make sure it is large enough to fit your applique shape.

I didn't do such a great job of step by step photos on this one, but it's pretty easy to explain anyway. I used no-sew Heat n Bond and ironed it onto a piece of felt to start (I use eco-fi felt which is made from recycled pop bottles. It is also washable, as opposed to wool felt which will get yucky if you wash it a lot). I would recommend using white felt, but so people can see what I'm doing in the tutorial, I used yellow-orange. The great thing about Heat n Bond is it has a paper backing that you can use to trace your image onto, it makes it easy to cut out later on. I chose to cut my image out of felt and then iron it onto my final fabric. If you wanted you could iron Heat N Bond onto both sides of your felt, then remove the paper backing on one side and iron on your scrap fabric, then trace several images onto the paper still in place, cut them out and iron them onto your final piece.


Here, I have cut out my mustache from the felt first, and then ironed it onto my fabric scrap.


Then, I cut out my mustache! Now it can be sewn or pinned anywhere. I think these would be adorable on some onesies for a baby boy (let's be honest though, I'd put it on a girl with no shame in my game).


Don't forget to enter for a chance to win a bag of scrap fabrics on my Giveaway Day post.


Thursday, October 13, 2011

Tutorial: Fabric Coasters


Here is the long awaited tutorial for the fabric coasters I have been making recently. I like it better than some other patterns I have done in the past because the final product doesn't need top stitching (though you could certainly add some if you wanted). These make a great hostess gift, so you may want to start stocking up now for all those Holiday functions coming up at year's end.


To begin, you will need to cut out 5 squares of fabric per coaster (as you can see I generally use 3 different fabrics in each coaster- a bottom fabric and then 2 squares each of top fabrics). I use 4" squares, you could certainly go a little larger, but I wouldn't recommend making them any smaller due to seam allowances (you do want to be able to use them, after all). I also cut out a 4" square of cotton quilters batting (you could substitute felt as well, I recommend the polyester kind as it is washable).


Once you have your piece cut out, you will want to iron each of your 4 top squares in half. Now you will have 4 strips that are 4" x 2", as well as your bottom and filling.


Next, you will layer your strips to make your top coaster piece. If you are making a set and want to make sure your top layers look as similar as possible, I would recommend layering all of your coasters at the same time, this way you will know that you layered the yellow on top of the red (in this example) the same way each time. To layer, make sure your folds are all to the middle of your coaster and the raw edges are on the outside edge. Try to get your fabric strips as snugly together in the middle as you can, if you leave large gaps you will be able to see your batting on the final project.


Once you have your top pieced together, you will layer your coasters to be sewn. Each coaster should have the batting or felt on the bottom, followed by your square of bottom fabric (wrong side touching the batting), and finally your woven strips (as pictured above).


Pin each coaster together to prevent any movement while sewing. Again, make sure to keep your top strips as close together in the center as you can. Sew around the entire outer edge. You will be using the center of your coaster to turn out your final project, so no gaps need to be left for turning (and hence no top stitching will be needed!).


Once you have sewn all the way around your outer edge, remove pins and clip off excess batting and fabric. As you can see, I cut off a little extra at the corners to make them less bulky in the final product.


Finally, turn out your finished coasters and press them flat with an iron. I use a crochet hook to push the corners out more evenly. Voila! Quick and easy coasters with no top stitching needed!


I generally use fat quarters and make matching sets, but you could make patchwork coasters out of any 4" x 4" scraps you have lying around. Squares not your thing? You could follow this tutorial with the same steps by cutting out circles instead (I might make my circles slightly larger, 5" or so) and make sure to clip around the edges before turning to get an smooth edge.

I'd love to see any of the projects you make off the site! Feel free to join Craftinomicon on flickr!


Wednesday, October 12, 2011

Fun with Fat Quarters!


If you are like me and can't help but feel like a kid in a candy store when you enter any fabric store or craft department, fat quarters (fabric cut to be 18" x 22") can be a great way to add a lot of options to your fabric stash without breaking the bank coming home with yards and yards of fabric. The problem? They aren't large enough for bigger projects unless you like to patchwork them together.

That's why I decided to make this little list of projects that can be done entirely from fat quarters! It's also a great list for people who maybe don't have a lot of time to do their crafty projects, as working on a smaller scale often helps me with the actual finishing of projects.

So what can you make from a fat quarter?


You can easily sew 2 fat quarters together (same fabric or two different fabrics), add some stuffing and now you have a fancy new throw pillow! If you use two different fabrics, it's even reversible. You could even get fancy and use piping around the edges if you wanted. I often make little appliques to sew onto one of my fat quarters to give it a little something special.


Coasters are another great fabric project that can be done with fat quarters. If you get a bunch of them in coordinating colors, you can make several sets. I generally start with 4" squares for my coasters, then layer them with some quilt batting or felt for added cushion. To see a full tutorial on how to make these coasters click here. I'm extra proud of these as I made them with my first ever fabric I designed myself at Spoonflower.


You could also make a bunch of these adorable boxy pouches with the addition of a zipper. The full tutorial for these can be found at Three Bears. This is a cute little blog, this tutorial is great, and I see a lot of adorable little boxy pouches being made this holiday. I may even forgo buying wrapping paper for my smaller gifts and use these instead. :)


If you have a little one, or know someone who does (or will have one soon) these baby booties from Heather Bailey Design are another great fat quarter project. The full tutorial, complete with pattern is included in this pdf. *Photo from Cherry Plum


Finally, don't forget about my fat quarter giveaway. You have until the 17th to enter, and wouldn't it be great to have some fat quarters to try out all of these projects with?


Thursday, August 4, 2011

Shark Plush

Here is a cute little felt shark project for you all. There is a template at the bottom of this post, you can resize it in your favorite image software to make a plush shark that is as large or small as you like! Also, upon looking at the pattern, I would say that if you make 2 of the top (main body) pieces large enough for a dog, you could easily turn this into the pug costume I showed yesterday with only a couple tweaks. What on earth would I use a felt shark for, you ask? Well, you could make several of these and turn it into a shark mobile, attach a magnet or pin back to a smaller version and you have those options as well. Or just give your sewing area or desk its own little shark invasion. Go nuts!

To make this shark you will need to cut out 2 of the main body pieces and one of the bottom pieces (the ones without the tail). As you can see from my picture, any color will do. I happened to fancy a green and magenta shark, you could certainly be more realistic. Add button eyes if you want, you could also embroider on some eyes, gills, etc. Add a mouth and teeth if you are so inclined. The pattern is simple, so lends itself to any embellishments you want to add yourself!


Saturday, June 4, 2011

Shop updates!

Hey everyone! I just got some more of my Rainy Day fabric from Spoonflower in the mail today, and I wanted to let you all know that my April Showers Bring May Flowers coasters have been added to my shop. So, if you didn't win the May Giveaway Day contest, and just have to have some of these for your very own, they may now be obtained! I am also working on some new Patchy Derm the Pachyderm stuffed toys that should be up by next week.


I hope you are all having a great weekend, the sun has finally come out this weekend in Portland and we are scheduled to have our very first 80+ degree day today! I'm sure I will fit some crafting into the sunshine and relaxing. :D


I am way behind on some projects I started months ago (for shame!, I know) but I am hoping to get lots done this next week so stay tuned for some exciting new projects.

Monday, May 23, 2011

May Giveaway Day! Coasters

Happy Monday, everyone! More importantly, Happy Giveaway Day! As part of Sew Mama Sew's May Giveaway Day, I am going to be sending these "April Showers Bring May Flowers" coasters! As you can see if you have been in this neck of the woods before, the back of the coasters uses my own Rainy Day fabric design from Spoonflower.com.

Now, on to the giveaway!

If you would like to enter to win these handmade coasters just post a comment at the bottom of this blog entry and tell me: What are you most looking forward to this summer?

A family vacation? Barbecues with friends? Picnics on the beach?


Entries will be accepted through May 25th at 9pm PST. A winner will be drawn at random and announced on the blog the 26th.

Prize will be shipped internationally, though if you live outside the U.S. and Canada please allow extra time due to customs.

Thank you for entering and good luck!

To enter more May Giveaway Day giveaway's go to Sew Mama Sew!

Wednesday, May 4, 2011

More projects from vinyl: Ideas from the readers!

I had to share this awesome project with you guys. One of my readers, Tania, asked for some tips on sewing with vinyl when I made this in February. Not to be outdone, she had some Frito chips bags and candy wrappers she wanted to reuse and turn into zipper pouches of her own!

Here is her blog post, poke around a bit, she also has one made with some candy wrappers. What awesome little pouches!!


Friday, April 8, 2011

Butterfly Collection Pillows!

It has been a very busy week! Lots of working, laundry, packing and gift making for my upcoming trip to Wisconsin to see my family. I'm excited for the trip but I am also exhausted from all the work! Here is the final outcome of my butterfly project from a couple days ago, butterfly collection pillows! These butterflies would make a lot of other great projects as well: tote bags, a sciency looking butterfly pincushion maybe? Some wall art, shadow box, etc. The best part is you only have to sew around the little body shapes so the wings are free to give your project extra dimension.

For the butterfly template I used, check out this post.

I got the original idea for this project at Ruffles and Stuff but I liked a more intricate butterfly, and wanted to use brighter colors.

Wednesday, April 6, 2011

Elephants on Parade!


I just finished these this morning. Aren't they just the cutest? Trips from Aunt Kari come with gifts galore and these little elephants will be just perfect. My smaller niece, Hannah will be getting the super soft purple fleece elephant. I have seen several different patterns for stuffed elephants, and I have to say as far as being usable by small children I prefer ones where the ears are sewn into a slit, like in these (it also helps ensure that your ears are even on both sides).

I would advise to find patterns you like, and change them up with your own twist. Maybe in the future I will decide I would like the trunk to point up rather than curling under, for example.


You may recognize this guy! It's a larger stuffed Patchy Derm the pachiderm. I added an extra little patch of scrap fabric to the backside. Flowered corduroy will be soft, and more durable for "Big Girl" Lexi. The tails of each are braided yarn, there is a huge knot on the inside and they are triple sewn in to make sure they don't fall out (or that their doggies don't help rip them out).


Tuesday, April 5, 2011

Spring is in the air!


It is an absolutely beautiful day outside! I know I have been MIA in the crafts department as of late, but I assure you it is a time constraint, not a lack of crafting that is keeping me from you all. I am taking a trip to Wisconsin next week to visit my family and have been hard at work on gifts for them (nothing is actually finished yet, I'm multi-tasking them all at the same pace to be done Friday).


This is going to end up being projects for my grandmother and my sister-in-law, for their respective birthdays. I thought the butterflies and bright colors were fitting for the day, and it will give you all a chance to start guessing at what I am making. I also have a little template photo you can use to make your own colorful butterflies! These would also make a great paper craft, but for now I'm sticking with the felt and sewing projects at hand. You could also find some images of your favorite type of butterfly, or many different butterflies to make a more diverse collection. I'm hoping to get the finished project(s) done and posted for you all tomorrow!


What kind of ideas do you have for springtime colors and/or butterflies?

Wednesday, March 23, 2011

Rain Cloud Brooch


Today was actually a very nice day in Portland, sun and everything. So, I guess I must have missed the rain, as I decided to make this cute little rain cloud brooch. I even added a little light blue glass bead rain drop, though I think the silver chain looks nice on its own as rain. A little stuffing, a little glue and a pin back and voila! a nice little rain cloud, only this one won't leave you all wet and gloomy.

Thursday, March 10, 2011

Orchid Barrettes

Here is a finished barrette from yesterday's progress post. They really don't take long to make, I was just a little bit overwhelmed with projects yesterday. This orchid is rather small, so there is no stuffing in it, simply two layers of felt for each of the petal shapes, sewn together (hand stitched, not machine). I used glass seed beads in the center, as I think it adds a nice shiny thing to the barrette that makes you look at it and say "oooohhhh...pretty!".