Showing posts with label kid friendly. Show all posts

Tuesday, April 1, 2014

Make Your Own Felt Raccoon Mask


A gal I work with volunteers at the Audubon Society every week and they were having a fun activity last week where all the volunteers were supposed to dress up like their favorite animal. She asked if I could help her create a Raccoon mask for her costume and this is what I came up with. It is super easy, inexpensive, and can be whipped up in about 30 minutes!

To make your own Raccoon Mask you will need:

Felt sheets: Grey, Black and White
Scissors
pen/pencil for tracing
fabric glue or needle and thread
Elastic or string/ribbon
Raccoon Mask Pattern


Start by printing out the pattern and cutting out the pieces. Arrange them on your felt squares and trace with pen; or pin them down to the felt and cut around the pieces if you find that easier. To make a true to life looking raccoon the base piece should be grey, the middle piece should be white and the eye/nose banding should be black. You can jazz it up for the kids and make any color of raccoon for them though - I think I might make some to send my nieces and nephew for Easter!


Once you have all of your pieces cut out, sandwich them together so the eye holes match up. You may have to do a little extra trimming to get the edges of the eyes nice and neatly matching up. Pin all 3 pieces together and stitch the outline of each eye. This will hold all of the pieces together so fewer pins are needed when stitching around the outer edge of the black and/or white pieces. If sewing isn't your thing, use fabric glue to stick your pieces together. Allow plenty of time for your mask to dry before wearing.

Once you have stitched the pieces together, it is time to add some elastic or ribbon so it can be tied on and worn. You could also make an adjustable strap using more felt strips and some velcro. I opted for some bright ribbon, I just think it looks cheery and fun :)

Then you are ready to show off your new mask around town. These are easy enough to whip up as party favors for your child's next birthday, but still look nice enough to be part of a special costume. If raccoons aren't your style, don't forget to check out my pug mask here, modeled after my Cousin's pug, Tottie.

Happy crafting!


Tuesday, March 25, 2014

7 Great Crafts for Spring


Spring is finally here (even though it doesn't quite feel like it everywhere). Get yourself in the spirit either way by making some of these cute Spring crafts. :)


Make some paper flowers. No matter what flower is your fave, you can find a paper variety to whip up on a weekend.


If gardening is your thing, these fabric covered flower pots are sure to brighten up your space. I love them as part of my tiny windowsill garden.


I saw these adorable bees over on The Experimental Home. Use your leftover plastic Easter eggs to whip up a hive full of them :)


These dinosaur garden markers were one of my favorite garden projects ever. They add whimsy and color to your garden while you are waiting for everything to sprout!


April showers bring May flowers, so you might as well join in the fun with a rain cloud brooch. If storms are more your style change it up with a cloud + lightning brooch instead.


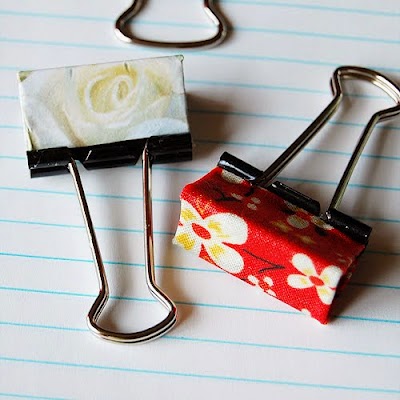
Don't forget to brighten up your office with some candy colored binder clips. Some clips, glue and scraps of paper or fabric are all you need!

Take a few minutes and make some bright Spring stationery! These cards are super easy and will brighten anyone's day when they open the mail.

What are your favorite Spring crafts?


Wednesday, May 4, 2011

DIY Garden Markers

I've been busy the past few days working on my container garden. We have a very small apartment, with no outdoor space but a large window ledge. This year I decided to try out some lettuce in window boxes, tomatoes in individual pots, and also some lemon thyme. We may or may not add some basil when it warms up a bit. To keep my plants organized (I have several types of lettuce and tomatoes) I decided to try my hand at making some bright, colorful garden markers.

I had some sculpey clay you bake in the oven to cure, so I thought I'd see how it worked in this application. As you can see in the picture, this marker is for my lemon thyme. I decided to make a little yellow lemon (that turned out ok, but not as well as it maybe could have) and stuck it onto a larger pink stake that I gently wrote "thyme" into. I allowed my creation to dry and harden overnight before I followed the baking instructions on the package to cure it.

I will say, that If you want to try this out, I would only use these markers for indoor potted plants, and I would probably make mine a bit thicker next time (these are only about 1/16 of an inch thick). I don't see them lasting me any longer than this season.

Worry not, for I will be sharing some other garden markers ideas with you later this week that I am still in the process of finishing. All of these other types will have much greater longevity, but are not quite as family friendly to make. This particular garden marker would be great to do with the kids in an afternoon.