Showing posts with label garden. Show all posts

Tuesday, March 25, 2014

7 Great Crafts for Spring


Spring is finally here (even though it doesn't quite feel like it everywhere). Get yourself in the spirit either way by making some of these cute Spring crafts. :)


Make some paper flowers. No matter what flower is your fave, you can find a paper variety to whip up on a weekend.


If gardening is your thing, these fabric covered flower pots are sure to brighten up your space. I love them as part of my tiny windowsill garden.


I saw these adorable bees over on The Experimental Home. Use your leftover plastic Easter eggs to whip up a hive full of them :)


These dinosaur garden markers were one of my favorite garden projects ever. They add whimsy and color to your garden while you are waiting for everything to sprout!


April showers bring May flowers, so you might as well join in the fun with a rain cloud brooch. If storms are more your style change it up with a cloud + lightning brooch instead.


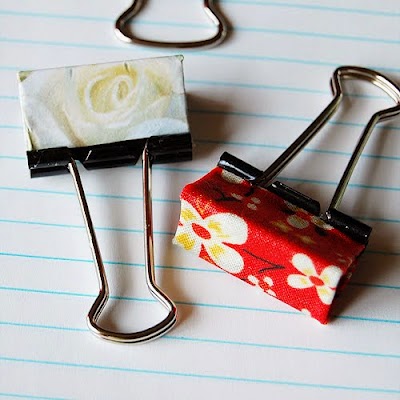
Don't forget to brighten up your office with some candy colored binder clips. Some clips, glue and scraps of paper or fabric are all you need!

Take a few minutes and make some bright Spring stationery! These cards are super easy and will brighten anyone's day when they open the mail.

What are your favorite Spring crafts?


Saturday, October 5, 2013

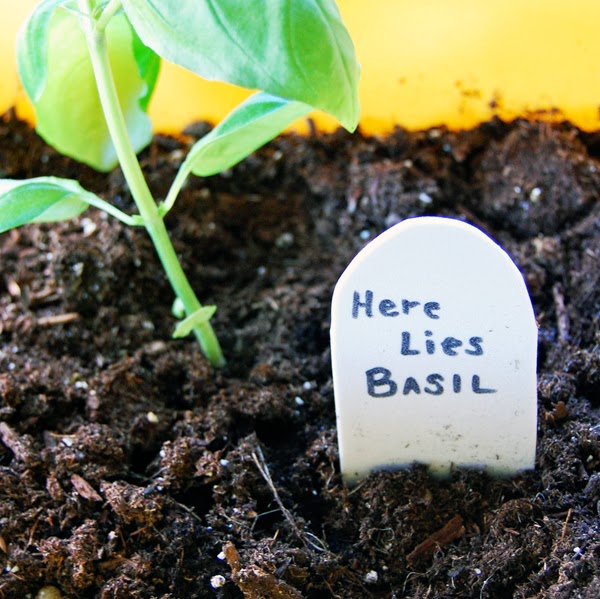
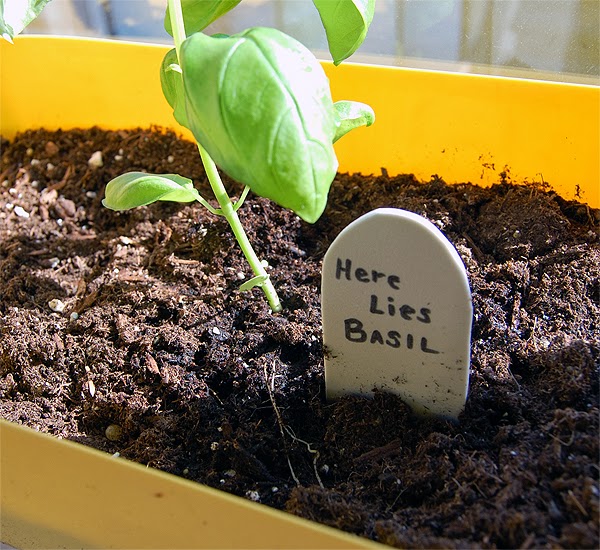
Easy Gravestone Garden Markers


I like adding all kinds of kitschy stuff to my indoor windowsill garden. Since it happens to be October, I thought I'd get into he spirit with some easy gravestone garden markers. These are made with grey craft foam, and I didn't even use a pattern. I just rounded the corners on some rectangular pieces (I like the edges being a little less than smooth, it reminds me of cut stone).


To make some of these for your own indoor (or outdoor) garden you will need:

a sheet of craft foam (or a couple sheets if you are making a lot of these)
pair of scissors
permanent marker


Start by cutting out rectangles and then rounding the corners on one side. I made my rectangles quite long to make sure I had enough to bury near my plants without covering any writing. You could also do regular rectangles or other shapes as you see fit to make more variety and visual interest in your garden.


Next, use your permanent marker to label your garden markers. I still have a basil plant on its last legs in my window box, so sadly this epitaph will be true soon (poor Basil!). You could also label plants not yet growing, or if your garden is done for the year, make some of these to label where you might plant things next year (for an outdoor garden you could get fancy and make some larger gravestone garden markers with cement--draw your epitaphs in the cement with a stick!).


This is a cute and quick craft you can do in just a few minutes and it adds a bit of whimsy to your fall garden :)

Happy October! :)


Tuesday, April 23, 2013

Starting the Garden


Happy belated Earth day everyone (Aren't I just about a day late for everything lately?). I thought a great thing to talk about this time of year would be starting a garden (and May is National Salad Month in the US, so I'm actually getting a little jump start on something!). I'm not an expert gardener by any means, in fact, I grow my entire garden in containers on my front patio or on my windowsills. As such, I am pretty limited in the scale of my garden, and what things I can successfully grow. No matter how large or small of a space you have, anyone can grow a small garden of their very own!

Above you will see a photo of my radish starts. I'm not huge on radishes, but the husband likes them. They are also a great crop to try if you don't have much gardening experience (or if you don't want to spend lots of long term attention on things). Radishes have a pretty short grow time (about a month) and you will get almost instant gratification because they sprout after only a couple of days. It's a great thing to plant if you have kiddos around because they will get to see something happening very quickly and could measure the progress daily.


I am also being rather brave and trying to grow some watermelons this year. I have one large pot with a vine growing right now and the plant is supposed to have personal sized watermelons, not the big guys. So I am hopeful that despite my small area maybe I will get a watermelon or two this year, and if not it's a nice experiment.

I also have visions of a "someday" garden dancing in my head, as someday the hus and I will have a house and yard. If you'd like to check out some of our ideas and lots of helpful info, you can check out my new Gardening board on Pinterest and follow along!

I also have some herbs, flowers, etc that I'm growing this year. Are any of you extra excited about your garden this year? If you need some cute ideas for labeling your garden try these Dinosaur Garden Markers or Glass Garden Markers.

Friday, May 11, 2012

Fabric Covered Flower Pots


When you start a garden, you may be shocked at how expensive decorative pots for your flowers can be. This is a quick and easy way to jazz up your flower pots with scraps of fabric. You could also use paper, just make sure you seal your pot well before planting.

To make these decorative pots you will need:

Plain Terra Cotta flower pots (I got a 3 pack of tiny ones from the Dollar store!)
Fabric scraps large enough to cover the surface area of your pot
Mod Podge glue
Scissors
A paint brush or sponge to apply glue
Spray on clear coat(br> Paint and Ribbon to decorate pot rim (optional)

To start, I used a piece of plain copy paper to make a template for my fabric. I wrapped it around one of my pots, and pressed against the edge between the pot and the rim, and along the bottom edge of my pot. You will end up with an arc shaped piece of paper, kind of like a rainbow. Then, I used my template to cut out fabric for each pot.


Once the fabric is cut, apply some glue to your pot in a thin coat. Lay your fabric over the glue (I start in the center of my fabric to avoid spreading it out crooked or getting puckers and gaps in the fabric) and smooth the fabric over the glue. Make sure to get glue under all of your fabric so it sticks evenly.


Once all of my fabric was glued down, I applied another coat of Mod Podge over the top of my fabric. Allow this to dry completely. I found it very helpful that I only had fabric going up to the lower rim of the pot so I could rest the pots upside down to dry. I left mine overnight to make sure all the glue was dried completely.


Next, add ribbon, paint or anything else you might like around the rim of your flower pot. You could use chalkboard paint if you want to be able to label your pot year after year. Apply a clear coat to the final pot to seal it and you are ready to plant!


To create the arrangement I have here, I placed one of my pots on top of an old thread spool. :) Don't these look extra bright and cheery? I'm also a sucker for anything teeny tiny, these certainly fit the bill :)

Tuesday, May 8, 2012

Dinosaur Garden Markers!


I always peruse the toy section of my local dollar store (you never know when you'll find something cute to send the nieces, right?). This time around, with garden crafts on the brain, I saw these little plastic dinosaurs and was inspired! They make great little garden markers for your plants, and add some whimsy to your garden. In addition, they work well with small potted plants and larger garden plots alike.

To make my dinosaur garden markers all I needed was:

A package of plastic toy dinosaurs ($1/pack of 8)
A permanent marker

Simply write the name of your plants on the dinosaur with permanent marker and allow to dry completely before touching. Place in your pot or in a garden row, and have a cute little dinosaur remind you what you've got sprouting :)

Wednesday, May 2, 2012

Easy Windowsill Garden


One thing that always seems to come at a premium is space, so lots of people think they can't possibly have a garden to enjoy. This post will show you how you can use even the tiniest of spaces, like a windowsill, to plan and enjoy an easy garden of succulents and air plants. These plants are also great for those of us with limited ability to keep plants alive as they don't need the amount of attention and watering many standard house plants do.


First of all, you will need to select your plants. While many stores have a gardening section this time of year, I recommend finding a local plant nursery if you can. Even better, if you have shops that specialize in succulents or air plants (which are both becoming increasingly popular). You will get a lot more help and knowledge from the staff at a nursery then at Wal-Mart, trust me. Make sure to select plants that will fit comfortably in your space. I chose some 2" succulents and a tiny air plant. My grand total came to 8 dollars, shopping at the local specialty store was actually cheaper for me in this instance, so as I mentioned, search them out if you have them!


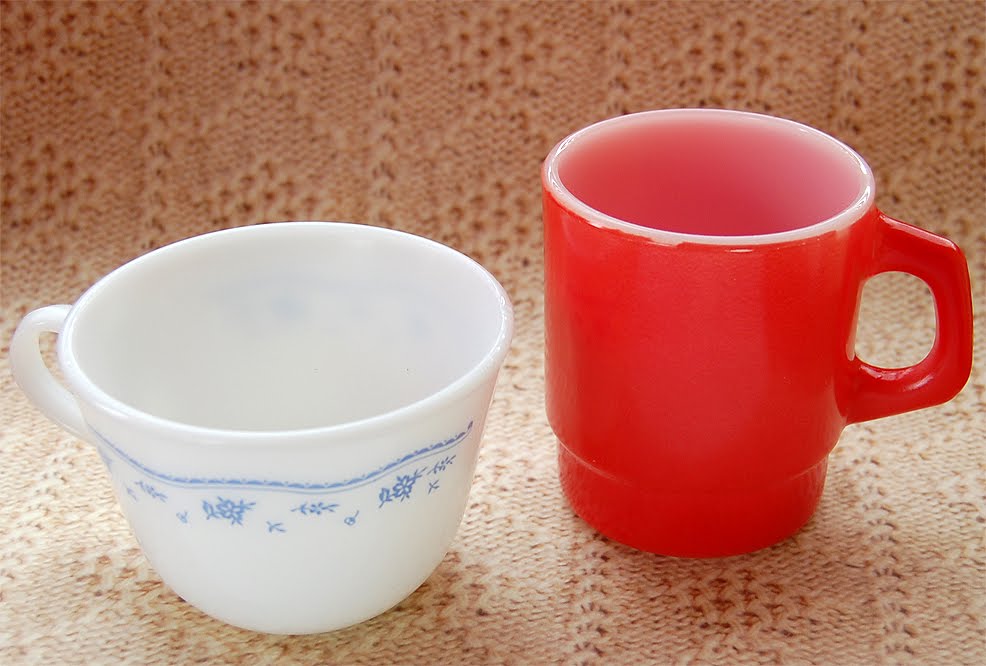
Next, you want to select your plants' new containers. Don't limit yourself to standard planters and pots, I happened upon these teacups (a vintage Pyrex and a Fire-King coffee cup) at my local Goodwill for 99 cents each. Pretty much every thrift store I've ever been in has a huge supply of old glassware at excellent prices. Why not try a candy dish, fondue pot or tea set? You can often find things of high quality that add extra visual interest to your garden.


The final step: re-potting and setting up your garden. This is where the information you can get from specialists is important. With succulents especially, you will want recommendations on the soil conditions. Plain old potting soil is probably not the route you should go to keep these babies alive. You may find you have to create your own mix of soil, sand and more. You'll also want information on how often to water your specific plants. The internet is a great source of info, but why take the extra time if you can get all you need to know in the same transaction?

As you can see, I placed my air plant in a green glass bud vase. Photosynthesis is actually inhibited by green light, so you may think that my plant might not bode so well. However, the tiny amount of light that comes in through the hole at the top seems to be doing a good job at keeping the plant healthy (all colors of light actually play SOME part in photosynthesis, but a plant could not be kept alive on green light alone). It is also important to point out that I don't really want my air plant to grow a whole lot, just stay alive. If it grows too much it will become way too big for my container, so I am only trying to maintain a balance in which it stays alive and about the same size. If you try out your own air plant, you may want to go with a clear glass container, though they require no container at all. You can simply set it on the windowsill by itself, or even wrap string around it and hang it up. I soak mine for about 20 minutes once every 2 weeks or so, and it's been doing great.

Finally, just sit back and enjoy your cute little garden! This is a great idea for Mother's Day or graduation. Who wouldn't want their own adorable little garden?

Monday, July 4, 2011

Garden + Croutons = Salad.

The sun is out in full force, and thanks to that we had lots of ripe tomatoes and lettuce this weekend for our first garden salads! Add in some croutons (insanely delicious) that my husband whipped up with the end from my French Bread from Friday and it was maybe the best salad I've had in a long time.

While this is more of an "OMG look what I ate this weekend!" post than a food craft, feel free to make some yummy croutons and enjoy a salad of your own. Here is how the husband whipped these up (if you made the french bread and have some that is day old, I really can't recommend using it to make these croutons enough).

You will need:

About 3 slices of french bread 1 1/2 inch thick (we used the last 5-6 inches of a loaf)
2 Tablespoons unsalted butter
1 clove garlic, minced
salt and pepper to taste


Heat a saute pan on your stove top over medium/ medium high heat and cut up your bread into bite sized cubes. Add your butter and garlic to the pan, then once the butter is melted toss in your bread cubes and stir them around to get them evenly coated.


Saute your bread cubes about 5 minutes, or until they are a a delicious, buttery golden brown perfection. Add salt and pepper and place onto your salad, enjoy!


Monday, June 27, 2011

My First Signs of Summer

As I have mentioned before, the husband and I have decided to challenge our normally black thumb's this year and started an indoor garden. I'm excited to say, it doesn't appear I have killed anything yet, and were it not for our weather only warming up today, I feel many of the things I started from seeds would be much further along now than they are. I bought my tomato starts at the farmer's market, mostly because I really love tomatoes and I wanted to make sure they were started on the right track. This picture shows the first of my little Sun Gold tomatoes starting top turn orange! Yum! I can't wait to throw these onto salads and bruschetta!

Speaking of salad, here is some of our Little Gem lettuce. I have to say, if you are a novice gardener like myself I would highly recommend starting out with lettuces. All of mine sprouted quickly and have been doing just great. One of my co-workers is from Hawaii and has even given me some seeds for a Hawaiian lettuce variety, I believe Manoa. Once it is bigger, I'll be sharing that with you as well, I'm pretty impressed with myself to be making all of this grow. We even have some yummy basil getting bigger by the minute.

To really Impress you all, I may take a photo of the whole garden in front of out window. Our tomato plants are freakishly huge, the Sweet 100's are about 8 feet tall. Had I known they would get that large, I wouldn't have done tomatoes, my poor little apartment barely has room for me to move anymore.

Are any of you gardening? Are you lucky enough to have something outdoors or are you limited to indoor containers like me? I'd love to hear what kind of things you are growing and if they are having much luck this year.


Asiatic Lily Mix Sale - Save 80%


Monday, May 9, 2011

Papercraft Garden Markers

Here is a no fuss garden marker that uses very few items. It isn't as durable as the glass garden markers, but if you change up the items in your garden every year or have trouble keeping track of small items like these, this may be the route you want to go. All you need is some thicker paper (scrap booking paper, construction paper, etc.), scissors, pen or marker and some clear contact paper.

Cut out your marker shape from the paper. I just did a standard stake marker, but you can get creative--shape it like a pepper, tomato, etc., make them circles, squares...go nuts! Once you have the paper cut out, write your label on the paper and then cover both sides carefully with the clear contact paper (this step is what makes it water resistant so you don't ruin your labels the first time you water the plants).


As you can see, at the bottom of the marker I have a little point to help it go into the soil more easily. You will probably want this point on your markers for the same reason, but it isn't absolutely necessary.

Also, I left a tiny bit of room when cutting around my contact paper. You want to make sure that the paper edges aren't exposed to the moisture of your soil or it won't be nice looking or last as long.


Glass Garden Markers

As promised, here is another idea for making your own garden markers. There will be a couple more fun ideas for more of these soon, as well. This garden marker is made from a glass tile (the same kind I use to make magnets). I used some of my favorite glass paint that you cure in the oven, and just painted on my herb name. If you get your glass paint in pen form, this would certainly look a little bit neater than mine, but I used what I already had on hand.

These are great for me, as I have my entire garden indoors on my windowsill. However, if you have a large outdoor garden I would suggest finding river rocks that are a bit larger and painting them with your veggie names and sticking them at the end of your rows. You could use regular paint if you do this, and just cover the entire rock with polyurethane (though many paints will be just fine if you skip that step).

Don't want to put all this effort into your garden markers? Later this afternoon I will have a super easy garden marker that uses only colorful paper, pens and contact paper coating!


Wednesday, May 4, 2011

DIY Garden Markers

I've been busy the past few days working on my container garden. We have a very small apartment, with no outdoor space but a large window ledge. This year I decided to try out some lettuce in window boxes, tomatoes in individual pots, and also some lemon thyme. We may or may not add some basil when it warms up a bit. To keep my plants organized (I have several types of lettuce and tomatoes) I decided to try my hand at making some bright, colorful garden markers.

I had some sculpey clay you bake in the oven to cure, so I thought I'd see how it worked in this application. As you can see in the picture, this marker is for my lemon thyme. I decided to make a little yellow lemon (that turned out ok, but not as well as it maybe could have) and stuck it onto a larger pink stake that I gently wrote "thyme" into. I allowed my creation to dry and harden overnight before I followed the baking instructions on the package to cure it.

I will say, that If you want to try this out, I would only use these markers for indoor potted plants, and I would probably make mine a bit thicker next time (these are only about 1/16 of an inch thick). I don't see them lasting me any longer than this season.

Worry not, for I will be sharing some other garden markers ideas with you later this week that I am still in the process of finishing. All of these other types will have much greater longevity, but are not quite as family friendly to make. This particular garden marker would be great to do with the kids in an afternoon.