Showing posts with label food crafts. Show all posts

Monday, February 10, 2014

Fudge Striped Shortbread Cookies


One of my husband's favorite cookies are Keebler Fudge Stripes. I decided that I'd make him some super special Fudge Striped cookies for Valentine's Day. You start with a simple shortbread cookie recipe and then add some melted chocolate, not nearly as daunting as I thought they might be.

To make your own Fudge Striped Shortbread at home you will need:

For the Cookies:

2 sticks of softened butter
1/2 cup vanilla sugar (you could also use 1/2 cup regular sugar and add in 1 tsp vanilla flavor instead)
2 cups flour (plus extra for rolling out your cookies/dusting your cookie cutters)

For the Fudge Stripes:

1 cup chopped dark chocolate
2 Tablespoons butter or coconut oil

Start by creaming your butter and sugar together in a bowl. Once the butter is light and fluffy and all the sugar us mixed in, add your flour and mix until incorporated. Pour your dough onto a floured surface and knead until smooth. Make your dough into a disk shape, cover with plastic wrap and allow to chill for about 30 minutes.

Preheat your oven to 300 degrees (F). Take your dough out of the refrigerator and roll it out to about 1/4" thick on a floured surface with a floured rolling pin.


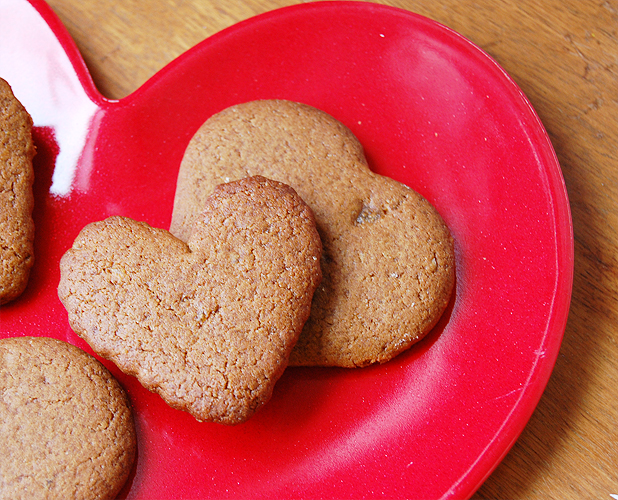
Select your cookie cutters (I chose the heart shapes above) and cut out your cookie shapes. Some of my heart shaped cutters are quite large, so I used a smaller cookie cutter to cut out another heart in the center. I will admit, one thing I never liked about fudge stripe cookies is that they have a hole in the middle, I want MORE cookie, not less. If you agree with me, then you can leave all of your cookies without the center cutout.

Place your cookies onto a cookie sheet lined with parchment paper and bake for 20-25 minutes, until they just start to brown a little around the edges. Once done, take out and place on a cooling rack until completely cool, mix up your chocolate for dipping while you wait.

I melt my chocolate in the microwave, but you can use a double boiler if you like. Just put your chopped up chocolate into a microwave safe bowl and add your butter or coconut oil. Microwave at 30 second intervals, stirring between each. It takes about 1 minute 30 seconds for all of my chocolate to melt (I stir as much as possible each time, if you need another 30 seconds don't feel bad-it happens).

Once you have your cooled cookies, dip the bottoms of each cookie into the chocolate and place them back onto some parchment (I even put mine on a cool baking sheet and then stick them in the refrigerator to help them set up faster). To make the stripes, I put the remaining chocolate into a sandwich bag, snip off a teeny tiny corner of the bag and use it to pipe on the stripes. These don't have to be prefect, because they are delicious either way. If you don';t want to mess with stripes, you can also just dunk the entire cookie in chocolate!

If you want to see some more "in progress" shots of these guys you can check them out on my Instagram. Happy Valentine's Day!


Wednesday, October 2, 2013

Favorite Fall Recipes

I love Fall, even in Portland where Fall means lots of rain. I think it's because I love to bake, not to mention sip yummy hot drinks while watching movies all snuggled up on the couch. It also might be because October is my birthday month (yes, I celebrate all month). If you agree, here are some of my favorite Fall recipes (they are good all year long, but once the rain starts I just can't stop making this stuff!).


Yeast Dinner Rolls. Great for big get together meals, I love making my house smell like fresh baked bread.


Hot Chocolate. This is the most chocolatey smooth hot chocolate ever!


Mac n' Cheese. Ooey gooey delicious cheese and pasta. I love this on it's own or served on the side of just about anything.


Chai Latte Concentrate. Super yummy and making it at home lets you control the spices and flavorings.


Mocha Roasted Almonds. These make the house smell great and are an easy snack to make.


The Ridiculous Grilled Cheese. I like about any grilled cheese, but this one is my favorite.


What are your favorite Fall recipes? I'd love to check them out!

Sunday, September 15, 2013

Mocha Roasted Almonds


It's rainy and chilly here today in Portland and I'm loving it! I decided a yummy smelling snack needed to be made in my oven today and these Mocha flavored Roasted Almonds fit the bill! They only take a few ingredients and about 40 minutes of your time (they also make a great Holiday gift. You know, if you're thinking about that already.).

To make you own Mocha Roasted Almonds you will need:

2 1/2 cups Raw Almonds
1/2 cup granulated sugar
2 Tablespoons Unsweetened Cocoa powder
1 1/2 teaspoons instant espresso powder
1 egg white

Preheat your oven to 325 (F). In a small bowl (3 cups or more by volume) beat your egg white until it is just frothy and beginning to lighten. Add in your almonds and mix them around until evenly coated with egg white.

In a zip sealed bag, mix together your sugar, cocoa and espresso powder. Shake until evenly combined. Add in your egg white coated almonds and shake to coat. Pour onto a sheet pan lined with parchment or a silpat mat.

Bake in oven for 30 minutes at 325 degrees, stirring every 10 minutes or so (this will clump together a bit if not stirred often- you can break it apart after it has cooled if necessary). Make sure you line your pan, as the mixture will stick to the pan if you do not (melting sugar just does that, you know).


Remove from oven and allow to cool completely before packaging. Eat these as a snack on their own, or put them on ice cream, cupcakes, etc. as a delicious topping!

If giving this as gifts, an easy way to package this is to put it into clear bags and stick that into one of these little boxes as shown below. You can find them at most craft and hobby stores (paper mache boxes would also work well.). Just tie it with a piece of colored ribbon and you have an easy yet cute treat box that is reusable!


Have you made any extra yummy snacks lately?


Don't forget to follow The Craftinomicon on your favorite social media site so you don't miss any upcoming food and gift ideas!


Tuesday, September 3, 2013

Peach Chevre Salad


This should have made my list for "Things I Love" in September, but I thought it deserved it's own special post. It's that good. The hus and I got a cheese plate at one of our favorite restaurants over the weekend, and two of the many items on it were peaches and chevre. Luckily, they were right next to each other on the plate or I may have missed out on this taste sensation. I decided to turn it into a salad at home, but this would also be great served on slices of baguette as a late summer appetizer. Go nuts, I won't judge.

To make this tasty Peach and Chevre salad you will need:

4 cups lettuce of your choice (I used red and green butter lettuces, spinach would be great as well)
1 ripe peach, sliced
2 ounces of chevre (for those of you unfamiliar, chevre is a tangy goat's milk cheese great for spreading or crumbling)

Wash your lettuce and gently pat dry (or use a salad spinner- woo!). Place into a large serving bowl (or divide evenly into 2 bowls). Top with peaches and crumble on your chevre. This serves 2-4 people as a side and can easily be doubled or tripled for a crowd. We are lucky enough to have peaches in season at our local Farmer's Market, so I am getting my fill while I can.


What Summer dishes are you filling up on?

Thursday, August 29, 2013

Edible Glitter


With lots of holidays coming up, I decided maybe I would try out making some edible glitter. This would work well for decorating cupcakes or cookies, rimming cocktail glasses, or even use some as face or body glitter on Halloween (it will sure wash off easier than regular glitter!).

To make your own edible glitter at home you will need:

1/4 cup granulated sugar
1/2 teaspoon fluid food coloring of your choice
baking sheet
parchment paper(optional but recommended)


Start by preheating your oven to 350 degrees and measuring out your sugar and adding in your food coloring. You can use more or less food coloring than this recipe calls for depending on how vibrant and deep you want your colors to be. I chose yellow food coloring, but added enough that my final product really looks more golden orange. I highly recommend liquid food coloring for this as it mixes in much easier and gives a nice even coating without too much stirring and mess. It also doesn't have all the additives that many gel or powdered coloring do. Mix your sugar and coloring together well.


Once you have mixed your sugar and food coloring together, dump it onto a baking sheet lined with parchment paper. The parchment paper helps keep your sugar from sticking to the baking sheet and will be really helpful when it comes time to put the final glitter into a container (just lift, fold and pour!).


Spread out the sugar as evenly as you can before baking. As you can see in the photo above, it is pretty clumpy and not that easy to spread out, just do the best you can.


I put my sugar in the oven for about 1 minute, then opened it up to give the sugar a little stir. If you don't mix this often you will get lots of huge clumps, or some of the sugar can melt together into a puddle of deliciousness (though not glitter, so keep an eye on this). I turned my oven off after about 3 minutes, as there is plenty of residual heat to finish drying out your glitter. My total "bake time" was about 10 minutes, I stirred the sugar around about every minute or so.


Allow your sugar to cool completely before putting it into a container (I used a small mason jar). While my sugar was cooling, I used the back of a spoon to crush it back up into smaller pieces against the baking tray (a poor man's mortar and pestle if you will). This definitely looks a lot more like glitter in smaller crystals, it's so shiny!


Use a small spoon to sprinkle this over cupcakes or frosted cookies for a little extra shimmer. I also recommend using honey or agave nectar around the rim of a glass and dipping to make festive cocktail rims for a party. If you want to use this as glitter face paint, use a clean paintbrush to apply a design to your cheek, etc. with light corn syrup and then sprinkle the edible glitter on top! Technically, this is more like the brightly colored sugar sprinkles you can get at the store. If metallic glitters are more your style try this recipe I found on Pinterest.

Are you looking forward to Fall and Holiday party season or are you still clinging to the last days of Summer?


This post is featured on the Made From Pinterest Saturday Link Party.

Wednesday, August 7, 2013

Brown Sugar Molded Chocolate Sharks


I recently saw this post over on the Rise & Shine blog on how to make chocolate molds using brown sugar. I thought it would be fun to try out some chocolate sharks for Shark Week! This is a great way to try out molding your own chocolates because it's really inexpensive (you don't need to buy any molds, only brown sugar!).

To try this at home you will need:

Brown sugar (I used light brown sugar)
a container to hold your sugar
3-D objects to make your mold with (I used plastic sharks)
chocolate (if you want something more colorful, you could test out some colored candy melts)
a microwave safe container to melt your chocolate in

Start by packing your brown sugar evenly into a clean container. Then firmly press your 3-D objects into the sugar, about half way up the object, to create your mold.


Next, chop up your chocolate and put it in your microwave safe dish. Microwave the chocolate at 20 second intervals, stirring between each interval, until the chocolate is melted and smooth (for me this took about 1 minute for a 1/2 cup of chopped chocolate). Once your chocolate is melted, carefully pour it into your mold. I tapped mine on the counter to get rid of air bubbles and make sure the chocolate got down into the "fin" areas of my mold. If you have little helpers, you may want to get small squeeze bottles they can use to get the chocolate into the molds without too much mess.


I was unfortunate in the weather, as it was quite hot the day I did my chocolate molds (room temp was about 90 degrees, ick). As a result, I put my poured chocolates into the freezer to set up and this caused extra brown sugar to stick to the chocolate when I took them out of the mold. If you do this in cooler weather, the chocolate should harden back up on the counter just fine and remove much more cleanly. Either way, this is definitely a fun little craft, I'm thinking about using those alphabet shaped magnets to make some letters for a birthday cake sometime!

Friday, April 12, 2013

The Ridiculous Grilled Cheese


Many of you may be aware, but for those of you who are not, April is Grilled Cheese month. In fact, today is actually National Grilled Cheese day, so take the hint and have an ooey gooey grilled cheese today! Maybe even this one. I have to say, I'm a huge fan of celebrating yummy foods that existed mainly in my childhood. This sandwich is not, however, that American cheese between white bread sandwich that many of us think of when we hear the term "grilled cheese". It happened a few weeks ago, whilst putting together a bit of this and that from the fridge that it came to be, and the husband and I dubbed it "The Ridiculous Grilled Cheese".


To make your own ridiculous sandwich you will need:

brie (if you've never had this cheese, really, go get some brie. It's worth it.)
fig butter (I get mine at Trader Joe's)
arugula
a baguette or some french bread, sliced as thick or thin as you like
mayo (you can use butter, but if you've never made a grilled cheese with mayo you don't know how crispy and golden brown that bread can really be!)

Start by slicing your bread, try to get each slice about the same thickness so it cooks evenly, but I can tell you, it's gonna be RIDICULOUS either way. Next, get some slices of brie, or if it's soft enough, just spread some onto your bread. Be pretty generous, this cheese is awesome and gooey.

Place brie onto one slice of your bread and spread some fig butter onto the other side. Slap some arugula between them and then spread your mayo or butter onto the outsides of both slices.

Place into a skillet that is already warm (I usually go medium to medium high heat on my stove top). Let side one cook for about 1-2 minutes (until that side is golden brown) then flip and cook the other side. Remove from skillet and serve warm. I like to slice mine into two pieces, it tricks me into thinking I have more sandwiches than I really do. I always want more sandwiches.

If you have trouble finding fig butter, apple butter would be a good substitute. Or you could add some apple or pear slices. Fruit and cheese are super yummy together. Go ahead, take a bite. Ridiculous.

Do you have a favorite fancy grilled cheese?


Sunday, February 17, 2013

Double Ginger Cookies


I got the original recipe for these from my Brother-in-law, Reed. It was for soft ginger bread cookies. I decided to jazz them up by adding in crystallized ginger in addition to the ground ginger already in the recipe. You could certainly omit my addition, or take it another step further by grating in some fresh ginger as well. These cookies are delicious! I made them as a Valentine's Day treat for the husband.

Ingredients:

1 cup white sugar
2 teaspoons ground ginger
1 teaspoon ground nutmeg
1 teaspoon ground cinammon
4 oz. crystallized ginger pieces
1/2 teaspoon salt
1 1/2 teaspoons baking soda
1 cup melted margarine
1/2 cup evaporated milk
1 cup unsulfured molasses
3/4 teaspoon vanilla extract
3/4 teaspoon lemon extract
5 1/2 cups all purpose flour

Preheat oven to 350 degrees, lightly grease cookie sheets (or line with parchment paper)

In a large bowl, stir together all dry ingredients.

In a separate bowl, stir together all wet ingredients.

Add the dry ingredients to the wet mixture one cup at a time, fully mixing each cup into the batter before adding the next cup. Mix until fully incorporated.

Once dough is smooth, roll dough to 1/4 inch thick on a floured surface and cut out cookies with the cookie cutter of your choice.

Place onto cookie sheets and bake 10 to 12 minutes (the cookies will spring back when gently touched when done).

Remove cookies from oven and cool on wire racks.


I know a lot of people that are turned off by the idea of roll out cookies. All the cutting, re-rolling, etc. If you are among them, you should still try these cookies just use a pizza cutter to easily cut your entire rolled out sheet of dough into cookie "sticks". These are extra snackable and great for dunking in milk!


Friday, September 7, 2012

Coconut Oatmeal Chocolate Chip Cookies


I know I haven't had a recipe post in awhile. Heck, I have been so busy it has been hard to get ANY posts up in awhile. I do appreciate you all hanging with me, I'll try to squeeze in some more posts soon! I came across this recipe the other day and had to try it! These cookies did not disappoint, and I have to say that if you are not a fan of coconut, I think you could easily substitute something like marshmallows (and even add nuts for a Rocky Road cookie that'd be AWESOME!). To make these cookies you will need:

1-¼ cup All-purpose Flour
¼ cups (Rounded) Cocoa Powder, Unsweetened
1 teaspoon Baking Soda
1 teaspoon Baking Powder
⅛ teaspoons Salt
6 Tablespoons Unsalted Butter, Room Temperature
3 Tablespoons Coconut Oil
½ cups Granulated Sugar
½ cups Light Brown Sugar, Packed
1 whole Large Egg
1-½ teaspoon Pure Vanilla
1 cup Shredded Coconut (sweetened was all I had, so I used it and it was yummy, you can also use unsweetened)
1 cup Old Fashioned Rolled Oats
1 cup Semi-Sweet Chocolate Chips


Combine flour, cocoa powder, baking soda, baking powder, and salt in a small bowl; set aside.

In a stand mixer, cream together the butter, coconut oil, and sugars. Scrape down the sides and then add the egg and vanilla; mix to combine. On a low speed, gradually add the flour and cocoa mixture, until incorporated.

Next, add the shredded coconut and oats and mix. Add chocolate chips and mix until just folded in. The dough will be pretty solid. Form into balls about the size of a heaping tablespoon and place on a lined baking sheet (I lined mine with parchment paper, you could also use a Silpat Baking Mat).

Bake at 350ºF for 11 minutes. Remove from oven and let cool for about 2 minutes more on the sheet, then remove and place on a cooling rack. This recipe makes about 36 cookies, and they disappear fast. Between my husband and I they didn't last a week, I'm both ashamed and proud of this :)

If you should happen to try these with nuts and marshmallows, let me know, I'd love to hear how they turned out!


*This post contains an affiliate ad, by clicking the ad and purchasing this item I will be granted a small commission.


Sunday, August 12, 2012

Shark Week, It's Here!


It is once again Shark Week! In fact, it is the Discovery Channel's 25th Shark Week anniversary this year, so feel free to check out all of their extra Sharky programming this week to get some inspiration! I'll be having some Shark and Under the Sea themed crafts on the page this week, possibly including food crafts! Before I get started on all the new posts, here is a recap of some of my old Shark and underwater crafts to get you started!

Pictured above is my super easy Felt Shark stuffie. For full tutorial go here. Why not go get started on your very own with the basic felt tutorial (multiples can be made in any color for a great mobile!).

Also, in honor of Shark Week, I have started a new Pinterest board featuring great Shark themed foods, crafts, gifts, decor, nail art and much much more. I will be adding many new items to the board every day this week!


Sharks too scary for your little undersea explorers? Give them a fun lunch with Hotdogtopus, the hot dog octopus! There will also be some more fun lunch buddies visiting us this week from the depths, so check back often!

Happy Shark Week!!

Saturday, May 19, 2012

Food Craft: Lime Bars


Finally another food craft! These Lime Bars are not only super yummy, but super easy and are perfect to take to all your Summer get togethers! I made mine to take over to a friend's place for Gin and Tonic (G&T) night. Truth be told, I could have eaten the whole pan myself, they were that good. I am a very unselfish friend sometimes.

I found the original recipe at MarthaStewart.com but naturally tweaked it to my own personal taste, which my pals all seemed to agree with :) To make your own batch of tasty lime squares you will need:

For the crust:

half a sleeve of graham crackers (4.5-5 whole cracker "sheets"), about one cup
1/2 cup shelled pistachios
5 Tablespoons unsalted butter, melted and cooled
1/4 cup granulated sugar
zest of 2 limes


For the filling:

1 can (14 oz) sweetened condensed milk
2 egg yolks
1/2 cup fresh lime juice*

*Feel free to substitute lemon or other citrus in this recipe

Preheat your oven to 350 degrees and prepare a 8"x8" pan. I sprayed some non stick spray on the bottom and lined mine with parchment paper.

In a food processor, combine your graham crackers, pistachios, sugar and lime zest until finely ground and well combined. I pulsed mine until the graham crackers were very fine, but I still had some larger chunks of pistachios. I love pistachios. Add in your melted butter, mix together well and pour the mixture into your prepared pan.

Press mixture into pan and up the sides slightly, bake about 8-10 minutes. Remove from oven and allow to cool for about 30 minutes.


To make the filling, whisk together your sweetened condensed milk and egg yolks until well combined. Add your lime juice and whisk until smooth. Pour into cooled crust and spread evenly. Bake at 350 degrees about 15 minutes, until the filling has just set. Cool on cooling rack completely and refrigerate at least one hour before serving. I refrigerated mine overnight (it was a long night).


If you want to make a full 9"x13" pan of these (and why wouldn't you?), just double the recipe :)

Thursday, March 22, 2012

Chocolate Cupcakes


As promised, here are the cupcakes I made for the beloved husband's birthday this year. They were super yum!


To make some for the special people in your life you will need:

* 1 3/4 cups all-purpose flour
* 2 cups sugar
* 3/4 cups good cocoa powder
* 2 teaspoons baking soda
* 1 teaspoon baking powder
* 1 teaspoon kosher salt
* 1 cup buttermilk, shaken (if you don't have buttermilk, you can pour 2 tablespoons of vinegar into a liquid cup measure and fill it the rest of the way with milk, let sit 10 minutes)
* 1/2 cup vegetable oil
* 2 extra-large eggs, at room temperature
* 1 teaspoon pure vanilla extract
* 1 cup freshly brewed hot coffee (if you don't have coffee you can just use 1 cup of boiling water)

Preheat the oven to 350 degrees F. Line 2 cupcake pans with liners, or grease well and flour (really though, go with liners).

Sift the flour, sugar, cocoa, baking soda, baking powder, and salt into the bowl of a stand mixer fitted with a paddle attachment and mix on low speed until combined. In another bowl, combine the buttermilk, oil, eggs, and vanilla. With the mixer on low speed, slowly add the wet ingredients to the dry. With mixer still on low, add the coffee and stir just to combine, scraping the bottom of the bowl with a rubber spatula. Pour the batter into the prepared pans and bake for 20 to 23 minutes, until a cake tester comes out clean. I made some mini cupcakes as well, and they baked for about 18 minutes.

*Note: this makes a very runny batter, don't be alarmed.


Top them with some of my yummy Peppermint Buttercream and you have a great little snack :)

Friday, March 2, 2012

Crostini with Fig Mousse


First off, I'm kind of flattering myself by calling this a mousse, let's all let me dream that I am that talented in the culinary arts for a moment. Worry not, this is still a tasty treat, and one that is great for those short on time (and kitchen talent!). It's also very low on ingredients, so it's great to whip up as an appetizer for a group.

To make these crostini you will need:

8oz. cream cheese (you could also use another soft cheese like chevre or mascarpone, but I had cream cheese on hand)
1/2 cup dried figs (I used black mission figs, you can add more or less depending on your taste)
1 baguette
bacon (optional)

In a food processor, combine your cream cheese and figs into a lovely "mousse". My cream cheese was at room temperature to make the blending easier. I have a beast of a food processor, so I didn't cut up my figs at all before adding them, if you know your food processor has trouble chopping up dried fruits, you may want to precut your figs.

I like to refrigerate my fig spread overnight to let the flavors mix in, but you could go ahead and spread this right out of the food processor if you like. Just cut your baguette into thin slices, toast in your oven (I put mine in along side some bacon*) then spread your fig and cheese mousse on top and enjoy!

*I cooked my bacon (sliced thick) on a cooling rack, on top of a jelly roll pan (to collect the drippings) for 25 minutes at 400 degrees. I put my bread in on the same rack for the last 5 minutes the bacon was cooking. I made this for 2 people so I only used 2 strips of bacon and half my baguette. Now we have leftovers for another day :)


Friday, February 24, 2012

Friday Food Craft: Thin Mints


I'm feeling a little under the weather today (my voice is completely gone) so I have a super easy food craft for you all. Who doesn't like thin mints? These are a super easy "cheater" version with no cookie making required!

To make these yummy little Thin Mints at home you will need:

Ritz crackers
1 (12 oz) bag of chocolate chips (I use dark or a mix of dark and milk chocolate)
1 Tablespoon oil (I use coconut oil, you could use butter or margarine as well)
1 teaspoon peppermint extract


In a microwave safe bowl, melt your chocolate chips and oil together in the microwave. I generally use 30 second intervals and stir well after each. It has never taken me more than 1 minute 30 seconds to get my chips all melted.

Next, add in your peppermint extract. Stir well to combine. Then start dipping your Ritz crackers*, tap off excess chocolate and set them onto a parchment lined cookie tray to set up. I stick mine in the refrigerator so they set faster (because I need my Thin Mints now!). Store in a zip top plastic bag at room temp (or in the fridge if you prefer them cold). Enjoy!

*My husband often uses chopsticks or straws when dipping his crackers to avoid messy fingers. Small tongs would also be great.

I love sweet and salty treats, so to me these are even better than the real Thin Mints!

Also, this is my 200th post! Thanks for reading everyone!


Follow my blog with Bloglovin

Friday, February 10, 2012

Friday Food Craft: Granola Bars


I'm a little obsessed with these granola bars. They are really yummy and packed with flavor. I came across the original recipe from Dinners, Dishes and Desserts and had to dabble with it to get my own favorites involved.

To make my version of these tasty granola bars you will need:

1/3 cup coconut oil
1/3 cup natural almond butter
1/3 cup honey (I used blackberry honey)
1/2 cup dark chocolate chips
1/4 cup semisweet mini chocolate chips
2 Tablespoons sunflower seeds
1/2 cup coconut, toasted
1 1/2 cups old fashioned oats, not quick oats

To start, melt your oil, almond butter and honey together in a small saucepan over medium low heat. Add in the dark chocolate chips and stir until melted.

Remove from heat and add in your remaining ingredients. Stir until everything is evenly coated and well combined.

Pour into a small baking dish that has been lined with parchment paper (my dish was 9"x7"). I tried some of these in a dish that had just been greased, and while they do come out, it is much harder to get them out of the pan looking nice. I'd definitely go for the parchment paper.

Place in refrigerator to set and store them there. They get a little gooey at room temperature, delicious but messy.

Enjoy! I have plans to try some with marshmallows and graham crackers as mix ins for S'mores granola bars soon!