Showing posts with label cookies. Show all posts

Wednesday, March 19, 2014

Peanut Butter Pie


I'm a teeny bit obsessed with peanut butter pie at the moment. It started when we grabbed some for dessert at one of our favorite restaurants a couple weeks ago. Since then I have been scouring the interwebs for recipes, below you will find my fave which is a mish mash of a couple recipes I have found and enjoyed!

For Crust:
8 ounces chocolate cookies
4 tablespoons butter, melted

For Filling:
1 cup heavy cream
8 ounces cream cheese (I used 1/3 fat cream cheese, because the heavy whipping cream makes me feel guilty)
1 cup creamy-style peanut butter
1 cup powdered sugar
1 – 14 ounce can sweetened condensed milk
1 teaspoon vanilla extract
1 teaspoon freshly squeezed lemon juice


First, add the cookies to the bowl of a food processor and pulse into fine crumbs (I used dark chocolate Fudge Stripe cookies-yum!). Combine melted butter and cookie crumbs in a small bowl, and stir with a fork to mix well. Press mixture into the bottom and up the sides of a 9-inch pie pan. I decided I wanted to make 3 smaller dishes of this pie, so I distributed my crust evenly between 3 ramekins about 5 inches in diameter. I still had plenty of filling for all three!

Next, pour the heavy cream into a bowl and beat using a stand mixer or hand mixer until stiff peaks form. I put my bowl in the refrigerator as I find this helps speed up the process a little bit. Store in refrigerator until ready to use. Place the cream cheese and peanut butter in a deep bowl, beat on medium speed until light and fluffy. Reduce speed to low and gradually beat in the confectioner’s sugar. Add the sweetened condensed milk, vanilla extract and lemon juice. Increase speed to medium and beat until all the ingredients are combined and filling is smooth.

4) Stir in 1/3 of the whipped cream into the filling mixture (helps lighten the batter, making it easier to fold in the remaining whipped cream). Fold in the remaining whipped cream. Pour the filling into the prepared pie pan. Top with a drizzle of melted chocolate on top (or if you are like me put more cookie crumbs or pieces of these cupcakes leftover from Husband's birthday on top), and refrigerate for three hours or overnight before serving.


Monday, February 10, 2014

Fudge Striped Shortbread Cookies


One of my husband's favorite cookies are Keebler Fudge Stripes. I decided that I'd make him some super special Fudge Striped cookies for Valentine's Day. You start with a simple shortbread cookie recipe and then add some melted chocolate, not nearly as daunting as I thought they might be.

To make your own Fudge Striped Shortbread at home you will need:

For the Cookies:

2 sticks of softened butter
1/2 cup vanilla sugar (you could also use 1/2 cup regular sugar and add in 1 tsp vanilla flavor instead)
2 cups flour (plus extra for rolling out your cookies/dusting your cookie cutters)

For the Fudge Stripes:

1 cup chopped dark chocolate
2 Tablespoons butter or coconut oil

Start by creaming your butter and sugar together in a bowl. Once the butter is light and fluffy and all the sugar us mixed in, add your flour and mix until incorporated. Pour your dough onto a floured surface and knead until smooth. Make your dough into a disk shape, cover with plastic wrap and allow to chill for about 30 minutes.

Preheat your oven to 300 degrees (F). Take your dough out of the refrigerator and roll it out to about 1/4" thick on a floured surface with a floured rolling pin.


Select your cookie cutters (I chose the heart shapes above) and cut out your cookie shapes. Some of my heart shaped cutters are quite large, so I used a smaller cookie cutter to cut out another heart in the center. I will admit, one thing I never liked about fudge stripe cookies is that they have a hole in the middle, I want MORE cookie, not less. If you agree with me, then you can leave all of your cookies without the center cutout.

Place your cookies onto a cookie sheet lined with parchment paper and bake for 20-25 minutes, until they just start to brown a little around the edges. Once done, take out and place on a cooling rack until completely cool, mix up your chocolate for dipping while you wait.

I melt my chocolate in the microwave, but you can use a double boiler if you like. Just put your chopped up chocolate into a microwave safe bowl and add your butter or coconut oil. Microwave at 30 second intervals, stirring between each. It takes about 1 minute 30 seconds for all of my chocolate to melt (I stir as much as possible each time, if you need another 30 seconds don't feel bad-it happens).

Once you have your cooled cookies, dip the bottoms of each cookie into the chocolate and place them back onto some parchment (I even put mine on a cool baking sheet and then stick them in the refrigerator to help them set up faster). To make the stripes, I put the remaining chocolate into a sandwich bag, snip off a teeny tiny corner of the bag and use it to pipe on the stripes. These don't have to be prefect, because they are delicious either way. If you don';t want to mess with stripes, you can also just dunk the entire cookie in chocolate!

If you want to see some more "in progress" shots of these guys you can check them out on my Instagram. Happy Valentine's Day!


Wednesday, December 4, 2013

Holiday Treat Roundup


It's no secret that I have a heck of a sweet tooth. What better excuse than the holidays to whip up bunches of sweet treats to share with everyone you know? Below you will find some of my all time favorite recipes for making up cookie plates for the holiday season!.


I replaced half the chocolate chips in these cookies with red and green M&M's for a more festive look.


If chocolate and peanut butter are your style, whip up these quick bars that my sister and I lovingly dubbed "Sugar Shock" bars, due to their super sweet richness!


You can't go wrong with these soft double ginger cookies!


We begged my mom every year to make Mounds Bars for the Christmas cookie tray. Add some colorful sprinkles for an extra fancy touch!


Almost nothing is easier than a batch of these Dark Chocolate Peppermint Truffles. Put them on the cookie tray or give them as gifts!


What are your favorite holiday treats?


Monday, September 2, 2013

Fluffer Nutter Cookie Sandwich


Have you ever had a Fluffer Nutter (a peanut butter and marshmallow fluff sandwich)? I was never really into them as a kid, but I've been on a real S'mores kick lately. S0 when I made some more of my awesome Peanut Butter Cookies for my husband the other day, I decided to slap a "roasted" marshmallow between a couple of them and it was pretty fantastic.

To make these for a crowd you will need:

My Peanut Butter cookies (recipe makes 4 dozen cookies)
1 bag of marshmallows
a campfire or microwave (for roasting or heating up your marshmallows


I popped my marshmallows in the microwave for about 10-15 seconds to get them ooey and gooey, but I really wish I had been camping. Nothing beats roasting marshmallows over a campfire. Put two cookies around your marshmallow and YUM! Fluffer nutter cookie sandwiches. You could always add chocolate for an extra S'moresey experience, I wouldn't hold that against you.

Hope you are enjoying the last days of Summer!

Sunday, February 17, 2013

Double Ginger Cookies


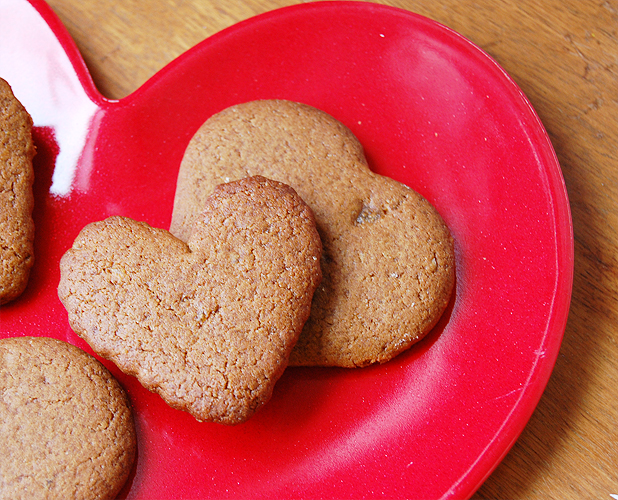
I got the original recipe for these from my Brother-in-law, Reed. It was for soft ginger bread cookies. I decided to jazz them up by adding in crystallized ginger in addition to the ground ginger already in the recipe. You could certainly omit my addition, or take it another step further by grating in some fresh ginger as well. These cookies are delicious! I made them as a Valentine's Day treat for the husband.

Ingredients:

1 cup white sugar
2 teaspoons ground ginger
1 teaspoon ground nutmeg
1 teaspoon ground cinammon
4 oz. crystallized ginger pieces
1/2 teaspoon salt
1 1/2 teaspoons baking soda
1 cup melted margarine
1/2 cup evaporated milk
1 cup unsulfured molasses
3/4 teaspoon vanilla extract
3/4 teaspoon lemon extract
5 1/2 cups all purpose flour

Preheat oven to 350 degrees, lightly grease cookie sheets (or line with parchment paper)

In a large bowl, stir together all dry ingredients.

In a separate bowl, stir together all wet ingredients.

Add the dry ingredients to the wet mixture one cup at a time, fully mixing each cup into the batter before adding the next cup. Mix until fully incorporated.

Once dough is smooth, roll dough to 1/4 inch thick on a floured surface and cut out cookies with the cookie cutter of your choice.

Place onto cookie sheets and bake 10 to 12 minutes (the cookies will spring back when gently touched when done).

Remove cookies from oven and cool on wire racks.


I know a lot of people that are turned off by the idea of roll out cookies. All the cutting, re-rolling, etc. If you are among them, you should still try these cookies just use a pizza cutter to easily cut your entire rolled out sheet of dough into cookie "sticks". These are extra snackable and great for dunking in milk!


Friday, September 7, 2012

Coconut Oatmeal Chocolate Chip Cookies


I know I haven't had a recipe post in awhile. Heck, I have been so busy it has been hard to get ANY posts up in awhile. I do appreciate you all hanging with me, I'll try to squeeze in some more posts soon! I came across this recipe the other day and had to try it! These cookies did not disappoint, and I have to say that if you are not a fan of coconut, I think you could easily substitute something like marshmallows (and even add nuts for a Rocky Road cookie that'd be AWESOME!). To make these cookies you will need:

1-¼ cup All-purpose Flour
¼ cups (Rounded) Cocoa Powder, Unsweetened
1 teaspoon Baking Soda
1 teaspoon Baking Powder
⅛ teaspoons Salt
6 Tablespoons Unsalted Butter, Room Temperature
3 Tablespoons Coconut Oil
½ cups Granulated Sugar
½ cups Light Brown Sugar, Packed
1 whole Large Egg
1-½ teaspoon Pure Vanilla
1 cup Shredded Coconut (sweetened was all I had, so I used it and it was yummy, you can also use unsweetened)
1 cup Old Fashioned Rolled Oats
1 cup Semi-Sweet Chocolate Chips


Combine flour, cocoa powder, baking soda, baking powder, and salt in a small bowl; set aside.

In a stand mixer, cream together the butter, coconut oil, and sugars. Scrape down the sides and then add the egg and vanilla; mix to combine. On a low speed, gradually add the flour and cocoa mixture, until incorporated.

Next, add the shredded coconut and oats and mix. Add chocolate chips and mix until just folded in. The dough will be pretty solid. Form into balls about the size of a heaping tablespoon and place on a lined baking sheet (I lined mine with parchment paper, you could also use a Silpat Baking Mat).

Bake at 350ºF for 11 minutes. Remove from oven and let cool for about 2 minutes more on the sheet, then remove and place on a cooling rack. This recipe makes about 36 cookies, and they disappear fast. Between my husband and I they didn't last a week, I'm both ashamed and proud of this :)

If you should happen to try these with nuts and marshmallows, let me know, I'd love to hear how they turned out!


*This post contains an affiliate ad, by clicking the ad and purchasing this item I will be granted a small commission.


Friday, February 24, 2012

Friday Food Craft: Thin Mints


I'm feeling a little under the weather today (my voice is completely gone) so I have a super easy food craft for you all. Who doesn't like thin mints? These are a super easy "cheater" version with no cookie making required!

To make these yummy little Thin Mints at home you will need:

Ritz crackers
1 (12 oz) bag of chocolate chips (I use dark or a mix of dark and milk chocolate)
1 Tablespoon oil (I use coconut oil, you could use butter or margarine as well)
1 teaspoon peppermint extract


In a microwave safe bowl, melt your chocolate chips and oil together in the microwave. I generally use 30 second intervals and stir well after each. It has never taken me more than 1 minute 30 seconds to get my chips all melted.

Next, add in your peppermint extract. Stir well to combine. Then start dipping your Ritz crackers*, tap off excess chocolate and set them onto a parchment lined cookie tray to set up. I stick mine in the refrigerator so they set faster (because I need my Thin Mints now!). Store in a zip top plastic bag at room temp (or in the fridge if you prefer them cold). Enjoy!

*My husband often uses chopsticks or straws when dipping his crackers to avoid messy fingers. Small tongs would also be great.

I love sweet and salty treats, so to me these are even better than the real Thin Mints!

Also, this is my 200th post! Thanks for reading everyone!


Follow my blog with Bloglovin

Friday, December 2, 2011

Nutella Cookies with Candy Cane Kisses


Friday once again, and I am back with an experimental recipe that was, admittedly, a little bit of a fail on my part. I meant for these to turn out more like thumbprint cookies, but I lacked margarine or shortening (and my first attempt didn't have enough flour). As a result, my cookies spread a little too much and so my pictures are not that great. The cookies do taste delicious, however, so I had to share anyway. I'm not above admitting my shortcomings. The recipe is, of course, updated, to give you a better shot at more eye pleasing cookies.


To make these tasty morsels you will need:

1/2 cup butter, softened
1/4 cup margarine, softened
3/4 cup brown sugar
1/4 cup granulated sugar
2 eggs, room temperature
1 cup Nutella (chocolate Hazlenut spread)
1 1/2 teaspoons vanilla extract
2 Tablespoons cocoa powder
3 cups flour
1/2 teaspoon baking soda
1/2 teaspoon baking powder
1/4 teaspoon kosher salt
Candy Cane Hershey's Kisses (If you don't want to mess with the thumbprint cookie idea, these can certainly be chopped into smaller pieces and mixed right in with the dough!)

In a large mixing bowl, use an electric mixer to cream the butter and margarine (I typically use both butter and margarine because I have found that butter gives a better taste, but margarine typically allows your cookies to become fluffier and not fall flat, alas I was out of margarine). Add the brown sugar and sugar and cream together. Beat in the Nutella, then add the eggs one at a time, mixing until combined. Mix in the vanilla extract.

In a small mixing bowl, sift together the flour, baking soda, cocoa powder, baking powder and salt. Add dry ingredients to the creamed mixture and mix well. Refrigerate dough for at least 30 minutes before scooping cookies.

Preheat oven to 350 degrees. Remove cookie dough from the refrigerator and scoop out tablespoon sized balls of dough. Roll gently in your (clean) hands to make a ball and place onto a parchment lined cookie sheet. Once all of your dough balls are on the cookie sheet, place one Candy Cane Kiss in the center of each one and press down gently. You want the kiss to stick into the cookie without smashing it flat. You will have a tray that looks something like this:


Bake your cookies at 350 degrees for 10-12 minutes. Cool on cookie tray for 5 minutes, then transfer to cooling rack to cool completely. Store in an air tight container.


Friday, November 25, 2011

Friday Food Craft: Mounds Bars


Hey all, it's food craft time again! Everyone has their favorite treat on the cookie tray around the holidays, and this is mine. It combines the chocolate and coconut flavors of a Mounds candy bar with a super yummy graham cracker crust, and when I was little I would make sure that I got more than my fair share off the cookie tray, Santa never got to have these. Poor old elf.

When I was little I had always assumed that some great magic must be how they tasted so good, but in reality they are incredibly easy to make, and dare I say it, you'll never want to eat a Mounds candy bar ever again after you've had these, they make a Mounds bar look like a slow ride to grandma's house. I'm going to credit the graham cracker crust for this.

To make some tasty Mounds bars for yourself this holiday season you will need:

For the graham cracker crust:
10 whole graham cracker "sheets" (in every box I've ever had this is, annoyingly, one sleeve plus one cracker sheet from a second sleeve)
1 stick of unsalted butter, melted
1/4 cup packed brown sugar

For the coconut filling:
3 cups flaked coconut
1 (14oz.) can sweetened condensed milk

Chocolate topping:
3 cups chocolate chips


Start by mixing your coconut and sweetened condensed milk filling together and leaving it in a bowl. This helps all of the coconut absorb the milk and get a nice even texture. Set aside while preparing the crust.

Preheat your oven to 325 degrees. To make the graham cracker crust, I always use the tried and true method of putting my graham crackers in a large zip sealed plastic bag and thumping it with a rolling pin to make crumbs. There is something very satisfying about pulverizing graham crackers in the name of delicious baked goods, but if you prefer the food processor approach, be my guest. Once you have your graham crackers reduced to crumbs, add in your brown sugar and stir a little to get an even mixture and then add in your melted butter. Try to get the butter to coat all of the graham cracker and sugar bits so it will hold together in the pan. Once mixed to your liking, dump your crust mixture into a 9"x13" pan and gently pat down. You will bake this layer at 325 for 10 minutes. Remove from oven and allow to cool slightly.

Once cooled about 5-10 minutes, add your coconut layer on top and spread evenly over the crust. I generally drop large spoonfuls of the coconut mixture evenly over the crust and then use an offset spatula to smooth them together into each other. The coconut mixture is pretty sticky, so you want to spread gently as to not pull up a bunch of graham cracker crumbs into the coconut and make a big mess.

After your second layer is spread evenly, pop your bars back into the oven for 15 minutes, still at 325 degrees. Your coconut will likely be slightly browned around the edges of the pan, this is a good thing. Those are my favorite bars out of the whole pan! Set bars on a cooling rack and melt your chocolate layer. This can be done in the microwave or on a stove top with the use of a double boiler. I opt for the microwave method most often. Simply put your chocolate chips in a microwave safe bowl and heat at 30 second intervals, stirring between each interval. Once your chips are almost all melted, I switch to 10 second intervals. Melting my chocolate chips generally takes a total of 1 minute 30 seconds- 1 minute 50 seconds (sometimes I add a few extra chocolate chips so it takes longer). Stir well to make sure there are no lumps, then spread over the coconut layer of your bars.

Allow to cool to room temperature, then refrigerate. I store these in the refrigerator, but you can also freeze them if you are doing a lot of holiday baking all at once, they freeze for storage beautifully. If you feel like adding some fun decorations, you can add your favorite sprinkles on top of the melted chocolate layer, my mom usually did. The best part: these are great at room temperature or straight out of the fridge!

Enjoy!


Friday, October 21, 2011

Friday Food Craft: Chocolate Chunk Cookies


What better to warm up the house on a dreary day than some yummy chocolate chunk cookies? Nothing better came to my mind, so that is just what you get for today's food craft! Speaking of dreary, how sad am I that I had the settle for a crummy picture taken in my kitchen with a flash? Ugh... Bear with me.


For this recipe you will need:

1 1/2 sticks unsalted butter, at room temperature
3/4 cups Brown Sugar
1/4 cups White Sugar
2 whole Eggs, room temperature
1/4 cup canola oil
1 teaspoon vanilla extract
3 cups Flour
1 teaspoon Baking Soda
1 pinch Salt
2 cups dark chocolate chunks (I cut up part of a Dark Chocolate "Pound Plus" bar from Trader Joe's)


Start by creaming your butter and both sugars together until smooth. Then, add in your eggs, oil, vanilla and salt and mix until combined. Sift in your flour and baking soda to avoid lumps, and finally add in your chocolate chunks!

Preheat your oven to 350 degrees. Line baking sheets with parchment paper and scoop out cookies about 1 rounded Tablespoon in size (I have a special cookie scoop I use). Cookies should sit at least one inch apart on the sheet.

Bake your cookies for about 12 minutes, until golden brown around the edges. Let cool on tray for a few minutes before removing to a cooling rack. Enjoy!


Friday, July 22, 2011

Friday Food Craft: Almond Joy Cookies!

I've got another sweet treat for you all today, and it can be done a couple different ways, both delicious! I adapted together a couple cookie recipes, and added some yummy mix-ins to get these chewy cookies with the chocolate, coconut and almond goodness of an Almond Joy candy bar! If you have a nut allergy, don't worry, you could easily leave out the almonds and have your own Mounds flavored treat instead. Actually, you can easily adapt this recipe to just about any cookie flavor you want, don't let me influence you too much :)

To make these scrumptious cookies you will need:

2 sticks Unsalted Butter, At Room Temperature
¾ cups Brown Sugar
¼ cups White Sugar
3.4 ounces-a 4 serving size box of Jello Coconut Cream Instant Pudding Mix*
2 whole Eggs
2 teaspoons Vanilla Extract
2-¼ cups Flour
1 teaspoon Baking Soda
1 pinch Salt
1 cup Bittersweet chocolate chunks
½ cup Unsweetened coconut flakes or shredded coconut pieces
½ cup sliced or slivered almonds


Preheat your oven to 350ºF and line two baking sheets with some parchment paper, or a Silpat Baking Liner. Set these aside.

In the bowl of your mixer, combine the butter and both sugars until light and fluffy.

On medium speed, beat in the pudding mix, eggs, and vanilla extract.

On low speed, mix in the flour, baking soda, and salt. Be careful to mix only until combined (do not over mix!).

Stir in the chocolate chunks, coconut and almonds (I happened to have some Almond Joy Pieces candies, so I threw those in for good measure with my other mix ins).

Use a measuring tablespoon or cookie scoop to scoop out the cookie dough onto the lined baking sheets. Bake for 10-12 minutes, or until the cookies are just turning golden and the centers are just set.

Let cool on the baking sheets for 5 minutes, before cooling completely on cooling racks. Enjoy!


* You can easily substitute Vanilla or French Vanilla pudding into this recipe, or use any flavor you like and any mix ins you prefer!


Friday, March 11, 2011

Friday Food Craft: Peanut Butter Cookies

Another Friday, another food craft. This week we are going back to the sweet side of things with a recipe for peanut butter cookies. I kind of mashed together a couple different recipes I had to come up with this batch, which is probably the best one I've ever made. They were a great way to brighten up a rainy day. I recommend them warm with a glass of milk :) Try them yourself and let me know what you think!


You will need:

1/2 cups butter, softened*
1/4 cup margarine, softened*
3/4 cups Brown Sugar, packed
1/2 cups Sugar
2 whole Eggs (room temperature)
1 cup Peanut Butter Creamy Or Crunchy ( like to use natural peanut butter as it has a very intense peanut flavor)
1.5 tsp vanilla flavoring
2 cups Flour
1/2 tsp Baking Soda
1/2 tsp Baking Powder
1/4 tsp Salt

*you will need an additional 1/4 cup of granulated sugar for rolling your cookies in prior to baking.

Preheat oven to 350 degrees F. In a large mixing bowl, use an electric mixer to cream the butter and margarine (I use both butter and margarine because I have found that butter gives a better taste, but margarine typically allows your cookies to become fluffier and not fall flat). Add the brown sugar and sugar and cream together. Beat in the peanut butter, then add the eggs one at a time, mixing until combined. Mix in the vanilla extract.

In a small mixing bowl, sift together the flour, baking soda, baking powder and salt. Add dry ingredients to the creamed mixture and mix well.

Pour 1/4 cup sugar in a small bowl. Take a heaping tablespoon of dough and form into a ball. Coat the ball in sugar by rolling it around in the bowl. Place on an ungreased cookie sheet about 2 inches apart.

Press the tines of a fork into the balls to create the criss-cross pattern on the top and to flatten the dough a bit. Bake for 10 to 12 minutes or until cookies are set and lightly brown around the bottom edges.

As you can see from the pictures, I also opted to add some chocolate chips to half of my cookies (the husband requested his be plain peanut butter--but I like a little something extra).

*I use both butter and margarine in this recipe as I find I enjoy the taste of butter in the cookies, but the cookies tend to rise and be a little fluffier with margarine.