Friday, January 20, 2012

Embroidery How To: French Knot


For my second embroidery tutorial, I decided to go for the gusto and tackle the French Knot. Once you get in some practice, this is actually really easy. However, a lot of people tend to recognize this not as the french knot, but as the dreaded french knot. The key for me has always been keeping your thread tight while making one.

French knots are mainly used for things like eyes, polka dots and the like on your patterns. If you are just practicing you won't need to draw yourself a bunch of dots as a pattern isn't necessary.

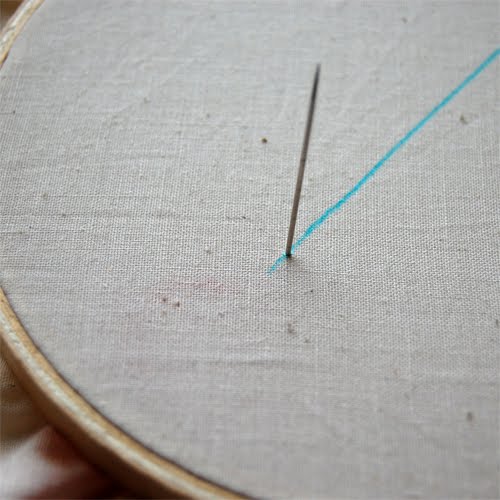
Start by pulling your thread through your fabric from back to front. Pull your thread tight, then wrap your thread around your needle as shown below (notice you are wrapping the end of the thread that is coming out of your fabric around your needle, not wrapping the end that is right by the needle). I typically wrap my thread around twice, but if you want a larger knot you can wrap three times.


The picture could be a little better, the pointy end of my needle is on the left of the frame in case you were wondering. Make sure to keep your thread tight around your needle as you go back through your fabric. You will want to get the needle close to the original point it came through, but not in the same hole.


Then, pull your needle all the way through and make sure you keep your thread tight while you pull it through to finish your knot. As I mentioned, keeping it tight is key, otherwise you get a sloppy knot.


Then, sit back and admire your knot. Isn't it cute? Here is a picture of two knots I made, the one on the Left was made by wrapping the thread around my needle three times.


If you missed it, go check out my tutorial on the back stitch here.

Friday Food Craft: Tomato Salad


The Winter weather finally arriving has made me long for tastes of Summer. I found these cherry heirloom tomatoes at the store, and knowing they won't taste half as good as the ones I get in the Summer, I made myself some tomato salad. Oh August Farmers Market, how I do miss you...


To make your own yummy tomato salad you will need:

1 pint of cherry tomatoes
1/4 cup of mozzarella cheese, cut into bit sized pieces
1 Tablespoon extra virgin olive oil
2 teaspoons balsamic vinegar
1/2 an avocado, cut into bite sized pieces
salt and pepper to taste


Cut your cherry tomatoes into halves or quarters, depending on the size you want. Toss them into a bowl, seeds and all. I generally use a bowl with a lid that seals tight, as I shake my salad up with the oil and vinegar dressing all in the same bowl. Plus, easy storage for leftovers :)

Add in your cheese, avocado (or any other yummy veggies you have sitting around, cucumbers and zucchini are also pretty tasty) oil and vinegar. Cover tightly and shake to evenly distribute the dressing. Add salt and pepper to taste.

I typically take my cheese out of the refrigerator and let it come to room temperature before making this, and I never refrigerate my tomatoes (it kills any flavor they may have). Serve salad room temperature. Enjoy!

Wednesday, January 18, 2012

Embroidery How To: Backstitch


I had a request on my Vintage Embroidery Pattern post to show you all how to tackle some of those great vintage patterns. Since embroidery isn't something you magically learn all at once overnight, here is part one in a series of tutorials that will help you to learn how to bring these pattern to life, and how to eventually create some patterns of your very own.

If you are just starting out you will need:

An embroidery hoop (or several of varying sizes)
Fabric you want to embroider on (if you are just practicing I recommend getting some cheap Muslin in either white or beige)
Embroidery Floss in your favorite colors
scissors
hand sewing needles
Embroidery transfer pen, or other method of pattern transfer (check out the embroidery area of your favorite craft store for the possibilities)
Needle threader*

*While not necessary, a needle threader sure comes in handy. If you don't know what a needle threader is here is a nice little visual for you, I found the image on Wikipedia:


Now, to get to learning some simple embroidery. I decided to start out with the backstitch as it is very versatile and you can do many embroidery patterns from start to finish with nothing but this stitch if you so choose. It can be used on both straight and curved lines and can look quite different on each individual line you stitch based upon the length of your stitches and thickness of your thread.

To start out, you may want to draw yourself several lines on your fabric, and trace some circles as well to practice making curved lines too. I like using the embroidery transfer pens, as they wash out easily from finished work.


Once you have your line transferred onto your fabric, thread your needle with your embroidery floss of choice. I am in love with this dark orange right now, and lucky for me it shows up great for tutorials :) Tie a knot at one end, and then start your stitch by pulling your needle through your fabric from back to front, about 1/4 inch from the end of your line, as shown below:


Since the backstitch is named because, well, you stitch back, I always start 1/4" from the end of my pattern line and then stitch back to the end of the line. If you want to do shorter stitches, just start in that far from the end of your line. Then, stitch to the end, like so:


To do the next stitch, push your needle through about 1/4" from where your first stitch ends, and stitch back so they meet:


Continue on with this until you finish your line:


Once you are done, tie a knot on the back. The back of your stitches will look something like this:


Once you have practiced a bit your stitches should be fairly uniform and you can start trying out more difficult patterns, or things you have drawn yourself!


Next: French Knots!!