Thursday, April 26, 2012

Criss Cross Bouquet Tying


If you liked yesterday's post on the basics of tying a bouquet you may be interested in this, only slightly more difficult way to embellish your bouquet. This criss cross method uses a second color of ribbon to add some extra color and style to your bouquet. Start the same way you did for the basic bouquet, but before adding your pins you will add in your second ribbon.


I started with a 2.5 yard piece of purple ribbon and pinned it in the middle to my base ribbon. Then you wrap each side around the stems crossing each other as you go.


Rather than pinning a straight line down the back of this bouquet variation, I chose to only pin in the center of each crossing section on the back of my bouquet (this will be facing the person holding the bouquet).


The front of the bouquet is finished at the bottom, by tying a bow where your ribbon ends cross. If you choose, you can leave the ribbon ends as long as you like or trim them shorter. I think leaving the extra long ends has a luxurious feel to it, so I typically don't trim them off.


As with all bouquets, this one is finished off by trimming all of your stems to the same length.


Wednesday, April 25, 2012

Basic Bouquet Tying Technique


This may be what we think of when the word "bouquet" comes to mind. If you have wedding plans in the mix, though, you may be just as concerned with ways to tie your bouquet! This is a tutorial for a very basic way to tie and wrap your bouquet to create the lovely handle seen below.


This handle is simple in that it is simply overlapping ribbon with some decorative corsage pins inserted in a line down the back.


Here are some supplies you may find helpful in doing this tutorial yourself: Ribbon, floral tape, scissors, corsage pins, and floral wire (you will of course, also need a lovely bouquet of flowers).


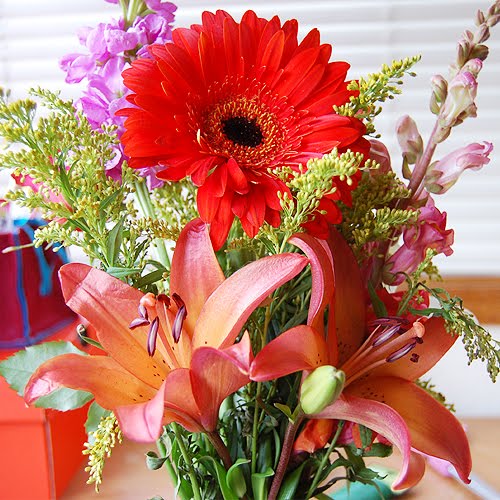
To start, arrange your bouquet in any way you most prefer. For this tutorial I used real flowers, but I love the versatility of using paper flowers with wire stems, so be sure to check back for a tutorial that is more specific to handmade flowers with wire stems later on. You will want to remove most of the leaves on the stems that are located where you will be making your handle. Leaving the stems on makes a lumpy surface for tying your ribbon.


Once you have your flowers arranged, tightly wrap your stems together with floral tape. This will hold your bouquet together tightly and be a good "canvas" for your decorative finish. If necessary, you can use a piece of floral wire, or some rubber bands to hold your stems together while you tape them tightly.


I recommend taping your stems as far down as you plan on wrapping your ribbon, as you can see above. At this point, you can trim the bottoms of your stems to an even length, or you can wait until you are all done with your pins and ribbon. Just make sure that your final piece has stems that are all one length, or your finished bouquet will look a little sloppy.

Now you are ready to wrap your ribbon around your stems. I generally start by using a piece of waterproof tape and taping the end of my ribbon up at the top of my stems and wrapping the ribbon downward. GO as slowly as you need, just try to wrap your ribbon tightly around the stems to avoid puckers and gaps. Once I get to the end of where I want my stems wrapped, I work my way back up to the top with a second layer of ribbon wrapping. This ensures a more even coverage and leaves you with both ribbon ends at the top of your bouquet. Since the bottom of your bouquet is most likely to be seen, it helps your finished look by having all ends at the top.

Now, you will add your corsage pins. It isn't necessary to pin all the way down, but it can give a nice finished look. TO space evenly, I lined up my pin tips with the tip of the leaf in front of it. It can take some practice to get a straight line (I'm not used to using shaped pins, so as you can see mine could use a little work). If you are just starting out, simple pearl corsage pins are easiest to line up.


Voila! Here is a bouquet all tied and pinned! You can use any color and width of ribbon you prefer, along with any color and shape of pins you can find. If this seems a little plain for your taste, be sure to check back over the next couple weeks as I will be giving tutorials on several ways to embellish your bouquet handles, and different materials you can use for tying them all up.

Sunday, April 22, 2012

Happy Earth Day!


Happy Earth Day everyone! It is an absolutely gorgeous day here in Portland, I hope you are having great weather as well wherever you may be. In honor of the Earth Day holiday, I thought I'd share links to some of my past projects that re-use magazine pages, as well as some of my favorite crafty tips for being more "green" and getting the most out of your crafty stash.

First, here are some projects that you can do with old magazines (or any paper you have lying around, phone books, junk mail, old notes and lists would all work as well!).


Office style gift card envelopes


Paper Twine - Great for tying up gifts!


Recycled Paper Beads Just use paper and mod podge to make tons of unique beads for jewelry and more!


DIY magazine envelopes Perfect for all of your correspondence, can be made to any size :)

Besides these ideas, you could also use scrap paper for making paper mache projects, collages, art journal pages and more!

Not really an abundance of paper in your life? Well, fear not, I still have some great earth friendly ideas for other crafty items!

If you do a lot of sewing, you likely have a lot of fabric scraps. If they are large enough, you may want to look at this craft project roundup of things to do with those scraps! If you find you have lots of small scraps, don't worry, there are still things you can do with them without throwing them away! I like to save up a bag with my tiniest fabric scraps and then mix them in with batting when I stuff fabric toys; it can save you money on extra batting, give your toys a nice texture and is soft and washable. Small scraps can also be used in mixed media art pieces.

If you are looking for an earth friendly craft activity to do with friends, think about hosting a craft supply swap. Have everyone get together some of their old supplies (I know I have tons of extra beads, paints, yarns etc. sitting around that I used for only one project) give them new life by trading with your friends for something new to your stash that they weren't using anymore! If you have leftovers, try to find a local school or after school program that needs craft supplies to take the rest :)

Do you have any other earth friendly ways to use up craft supplies? Post a comment with your ideas or "green" projects I'd love to see them!

Thursday, April 19, 2012

DIY Agate Jewelry


I'm no fashionista, but every now and then I come across a fashion trend that I like and find myself wondering how I can get in on the action without the huge price tags that often go along with trends. I saw this article on MSN.com a few weeks ago and was inspired. I used to do some jewelry making back in high school and college. The real, making your own bezels, setting stones, cutting, filing and polishing metals kind of jewelry. But who has time for all of that?

You will notice that many of the pieces in the article have HUGE price tags as well. Sure, geodes and agates are beautiful and make a statement, but who has hundreds to spend on a piece that probably won't make it to your every day wardrobe? That's where I come in: DIY agate jewelry!


If you are lucky, you have some kind of rock or gem shop locally where you can browse through agate slices at your leisure. You may even have the good fortune I did and find a place that has pre-drilled pieces the perfect size for pendants. If not, you can find places online to order your agate slices pretty cheaply, The Fossil Cartel has some online, but you don't get to select your exact size, shape, color, etc. We happen to have a Fossil Cartel store in town, as well as an independent gem and rock shop. Even when I don't make jewelry, I LOVE going through rock shops. You can find some great natural stone beads and other neat things to hoard away for future projects (not that I ever do that...).


To make my necklace I used a slice of pre-drilled agate, an 18" length of jewelry chain, 2 jump rings, a magnetic clasp and one bail (all store bought). Thanks to some sales, the total for my necklace came in at 8 dollars!

The bracelet was even easier! All I used was a slice of agate, a bracelet cuff from the craft store and some E-6000. Make sure you clean your agate and cuff well before applying the glue (I used rubbing alcohol and a soft cloth), apply your E-6000, position your agate on the band and leave to dry overnight (or even better 2 whole days, but who can wait?).


My favorite part about these two projects, is that you can make them with very little to no real jewelry making experience!

What fashion trends are you crushing on? Do you ever try to make your own cheaper versions?

Wednesday, April 18, 2012

Butterfly Wall Art

I'm breathing a huge sigh of relief as I am finally unpacked, with internet connected and my craft supplies all ready to go! I had some requests for Spring and Summer DIY art projects, so I thought I'd start out with something pretty easy and highly customizable!

To make a paper butterfly collage of your own you need a few supplies:

Decorative paper
Scissors or Xacto blade
Butterfly images to trace and cut out (I have provided some at the bottom of this post which can be made to any size you like, but feel free to make some of your own or image search around the internet)
Pins for mounting butterflies to the wall, or a canvas to mount butterflies to before wall mounting.

You can use any paper you like, but for butterflies you want to stand alone and mount to your wall individually, I would recommend card stock as other papers do not hold their shape as well (wings may get a little droopy, especially on larger sized cut outs). All you need to do is trace your butterfly image onto your paper, cut it out and position any way you like. For something you want to be able to move (or if you aren't allowed to make a bunch of holes in your wall in a rental) You can get a canvas to secure your butterflies to, or a magnet board (then attach magnets to your butterflies).

I also recommend thinking outside the box a little with your paper. I have some wonderful photo realistic scrap booking paper, and I think my favorite butterfly is the one with an image of a sparkler on it. Never would you find this in nature, but it sure reminds me of 4th of July cookouts and all of the other Summer activities that I just can't wait for :)


Using a more decorative paper also makes your butterflies much more interesting without having to cut out extra details. If you use a plain colored paper, you may find yourself wanting to cut out some designs in the wings to add extra visual interest (this is great but can be time consuming). The sky is really the limit on a project like this, so have fun with it!

Here are some scalable templates for butterflies. Some hand drawn, the other found on an image search at Butterfly Utopia.

Tuesday, April 17, 2012

Sneak Peeks via Instagram!


In the absence of my home internet connection (which is now back, hooray!), The Hus and I decided to do some exploring around our new new neighborhood and get some instagram photos thanks to my new favorite Android app. :)

Above you can see a quick snap of some paper craft butterfly art I am working on (Full post with much higher quality photos and a tutorial will be forthcoming).


We got to take in a couple Happy Hours at the likes of Swift Lounge and Grain & Gristle here in PDX to wind down from all of our unpacking (which I am still finishing up). Can I swoon yet again over how much I adore anything in a mason jar? <3


We spied this colorful berry bush on a stroll through the new neighborhood. Anyone know what kind of bush this is? It was just absolutely gorgeous with the white flowers and bright red berries, but I'm no horticulturalist so looking up plants is not my forte.

What have you all been up to this Spring?

New crafty posts coming soon! For more sneak peeks into what I'm up to, feel free to follow my instagram feed here.

Thursday, April 12, 2012

Moving On Up!

As many of you keeping tabs on me on facebook already know, the lovely hus and I moved into a new apartment this past week. It has been pretty rough in crafty land for me since most of my things have been living in boxes while being moved and rearranging the new place. Also, excuse the lack of images as we currently have no internet hooked up at the new place (it's really hard for me to have no internet!) and my digital camera is still packed away.

The lack of internet will be giving me plenty of time, however, to get my craft corner back together and work on some new projects to share, so make sure to check back on the 16th (hopefully! If I go longer than that with no internet I may lose my mind entirely) I am going to have some cute Spring/Summer themed art projects as well as some more projects that got set on the back burner in March due to packing for the move.

Did I mention I absolutely hate moving? It's on my top 10 worst experiences list. I'll be glad once everything is back in order.

Tuesday, April 3, 2012

Instagram!


As many of you know, Instagram was released for Android today! As I use an Android phone, I am very excited to get to start using this photo app like all the cool kids with iphones :) If you want to follow my photo goodness, I can be found @craftinomicon, of course!


Image of Insta-Grahams from Bakerella.com. Such a cute idea!

Monday, April 2, 2012

April Already?

I'm not sure where the time has gone, but it is somehow April 2nd already! How did this happen? I apologize for being an absentee blogger lately, the hus and I are still gearing up for our move to a new apartment later this week (I just want it to be over and done with--I hate moving!).

I will have some cute Spring projects coming up, and am going to be playing some catch up with posts I was supposed to do last month, but the time got away from me (Seriously? April? I'm baffled). Hopefully I will keep things organized enough that I don't lose all of my in progress projects while moving :)

In the meantime, for those of you keeping up with time, its about time to get started on gardening for the season. I found this great blog post at The Skinny Gourmet about Herb Gardening that is a great resource for first timers, or if you haven't herb gardened with much success, it has lots of great tips!