Showing posts with label flower pots. Show all posts

Tuesday, March 25, 2014

7 Great Crafts for Spring


Spring is finally here (even though it doesn't quite feel like it everywhere). Get yourself in the spirit either way by making some of these cute Spring crafts. :)


Make some paper flowers. No matter what flower is your fave, you can find a paper variety to whip up on a weekend.


If gardening is your thing, these fabric covered flower pots are sure to brighten up your space. I love them as part of my tiny windowsill garden.


I saw these adorable bees over on The Experimental Home. Use your leftover plastic Easter eggs to whip up a hive full of them :)


These dinosaur garden markers were one of my favorite garden projects ever. They add whimsy and color to your garden while you are waiting for everything to sprout!


April showers bring May flowers, so you might as well join in the fun with a rain cloud brooch. If storms are more your style change it up with a cloud + lightning brooch instead.
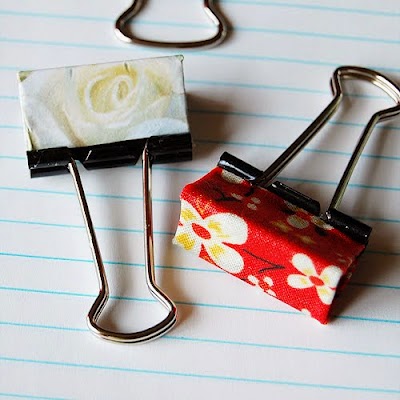

Don't forget to brighten up your office with some candy colored binder clips. Some clips, glue and scraps of paper or fabric are all you need!

Take a few minutes and make some bright Spring stationery! These cards are super easy and will brighten anyone's day when they open the mail.

What are your favorite Spring crafts?


Friday, May 11, 2012

Fabric Covered Flower Pots


When you start a garden, you may be shocked at how expensive decorative pots for your flowers can be. This is a quick and easy way to jazz up your flower pots with scraps of fabric. You could also use paper, just make sure you seal your pot well before planting.

To make these decorative pots you will need:

Plain Terra Cotta flower pots (I got a 3 pack of tiny ones from the Dollar store!)
Fabric scraps large enough to cover the surface area of your pot
Mod Podge glue
Scissors
A paint brush or sponge to apply glue
Spray on clear coat(br> Paint and Ribbon to decorate pot rim (optional)

To start, I used a piece of plain copy paper to make a template for my fabric. I wrapped it around one of my pots, and pressed against the edge between the pot and the rim, and along the bottom edge of my pot. You will end up with an arc shaped piece of paper, kind of like a rainbow. Then, I used my template to cut out fabric for each pot.


Once the fabric is cut, apply some glue to your pot in a thin coat. Lay your fabric over the glue (I start in the center of my fabric to avoid spreading it out crooked or getting puckers and gaps in the fabric) and smooth the fabric over the glue. Make sure to get glue under all of your fabric so it sticks evenly.


Once all of my fabric was glued down, I applied another coat of Mod Podge over the top of my fabric. Allow this to dry completely. I found it very helpful that I only had fabric going up to the lower rim of the pot so I could rest the pots upside down to dry. I left mine overnight to make sure all the glue was dried completely.


Next, add ribbon, paint or anything else you might like around the rim of your flower pot. You could use chalkboard paint if you want to be able to label your pot year after year. Apply a clear coat to the final pot to seal it and you are ready to plant!


To create the arrangement I have here, I placed one of my pots on top of an old thread spool. :) Don't these look extra bright and cheery? I'm also a sucker for anything teeny tiny, these certainly fit the bill :)